Personally I’ve always appreciated the emphasis on Populi versus Dei especially considering tumultuous, fractious and socialist history of Europe. But what it expresses best is the materialistic notion that perfection, i.e. God, is possible from the voice of the people and that truth resides in each and everyone of us. So this is my food for thoughts blog article about software technology. If you found article on this blog useful, click on any ad so that I can have a drink on you.
wxWidgets not only works for C++, but also has bindings for python, perl, java, lua, eiffel, C# (.NET), basic, ruby and even javascript (see General Information for bindings). It is one of the most complete GUI toolkits. There are many utility classes. There is a lot of documentation (though a bit fragmented in places). Free for personal and commercial use. Whenever possible, wxWidgets uses the native platform SDK. This means that a program compiled on Windows will have the look and feel of a Windows program, and when compiled on a Linux machine, it will get the look and feel of a Linux program. A positive side effect is that wxWidgets is thus more likely to look, behave and feel native - sometimes including native features for free (e.g. possibility to have spellchecking built-in in all text areas on OS X). A negative side effect of this is that it is more likely that the behaviour is different between platforms; toolkits where widgets are lightweight lose some of the native aspect but also minimize platform-specific code (hence minimizing the risk of different behaviour from platform to platform and also minimizing the risk of platform-specific bugs). Concentrating on native looks also mean wx may not be best suited for applications that want a customized look instead of the system's theme.
Windows Build extract everything under
C:\wxWidgets-2.8.11
Go to C:\wxWidgets-2.8.11\build\msw
open wx.dsw with Visual Studio 2008. Visual Studio will then ask you if you want to convert the Visual Studio 6 project to visual studio vcproj. Select yes to all. By default wxWidgets will target win32 platform but you can add x64 platform.
All lib will be generated under
C:\wxWidgets-2.8.11\lib\vc_lib
wxWidget works well with GTK+ because GTK is one of the choice to build wxWidget on Linux.
GTK+
http://www.gtk.org GTK+, originally the Gimp toolkit, is a LGPL C-language GUI library for Unix systems. It has been ported to Windows, VMS, and other systems (MacOS X currently possible through Apple's X11.app, native version in development) using the same API. However, primary development and focus is for Unix, with multi-platform development mostly as an afterthought. GTK+ is the primary library used to construct user interfaces in GNOME. Unlike wxWidgets, GTK+ supports C (and there is a C++ wrapper called GTKMM, http://www.gtkmm.org ) The API is quite well developed, and includes safe casting and other things; but C++ has these built in. It's built on top of glib, a general-purpose library (similar in some ways to the C++ STL -- it provides a few data structures, functions to help memory management, etc). It looks the same on all platforms, except Windows XP, where it tries (with some success) to get Windows' native look and feel with the Wimp theme, which uses UxTheme. However, it's still very much a Unix library.
Building GTK+ on Windows requires MinGW and MSys which might mot be an easy task some
Stable release for GTK+ is available on:
GNU/Linux and Unix Windows (32-bit) and 64-bit OSX
For windows http://www.gtk.org/download-windows.html there are all-in-one bundles of the GTK+ stack including 3rd-party dependencies, both of GTK+ 2.16 and 2.20. The bundles contain both binaries and a lot of developer files, many of which are relatively irrelevant. If you intend to redistribute the GTK+ run-time, you need to figure out which files you can leave out yourself.
CMake is a great way to generate Visual Studio 2008 solution for wxWidgets/GTK UI. CMake GUI will help you browse for all library include path and library. Cmake will update the build folder and cache all missing entry inside CMakeCache.txt
# This is the CMakeCache file. # For build in directory: c:/Dev/Project/Source/build # It was generated by CMake: C:/Program Files (x86)/CMake 2.8/bin/cmake.exe # You can edit this file to change values found and used by cmake. # If you do not want to change any of the values, simply exit the editor. # If you do want to change a value, simply edit, save, and exit the editor. # The syntax for the file is as follows: # KEY:TYPE=VALUE # KEY is the name of a variable in the cache. # TYPE is a hint to GUI's for the type of VALUE, DO NOT EDIT TYPE!. # VALUE is the current value for the KEY.
When clicking on generate a solution for your compiler EG Visual Studio 2008 will be generated. From there you can open the solution and step into wxWidget/GTK UI. GTK offer the advantage to be stable in term of API which means that if you build a UI using GTK today it should work 5 years from now.
On the other hand Trolltek team made quite some changes between QT 3 and QT 4 which require some work to translate old code to new code. See Moving from Qt 3 to Qt 4 http://doc.trolltech.com/4.3/porting4-overview.html When starting a project from scratch QT 4 would be a good solution.
QT
Both Qt (http://www.qtsoftware.com/) and wxWidgets have many non-GUI-related classes, such as date/time, containers, networking and OpenGL functionality. Qt4.5 is available on MS Windows, Mac, and GNU/Linux under the LGPL and under a commercial license. All ports of wxWidgets are distributed under a permissive modified (but explicitly OSI-approved) LGPL, which allows development and distribution of proprietary applications without license costs. Qt doesn't have true native ports like wxWidgets does. What we mean by this is that even though Qt draws them quite realistically, Qt draws its own widgets on each platform. It's worth mentioning though that Qt comes with special styles for Mac OS X and MS Windows XP and Vista that use native APIs (Appeareance Manager on Mac OS X, UxTheme on Windows XP) for drawing standard widget primitives (e.g. scrollbars or buttons) exactly like any native application. Event handling, the resulting visual feedback and widget layout are always implemented by Qt. An approach similar to Qt's is achieved with wxUniversal. It should be noted that on KDE and Qt for Embedded Linux platforms, Qt is the native GUI library. Qt is used by several large projects like KDE (on the other hand, wxWidgets is used by projects like the AOL Communicator) Qt makes extremely liberal use of virtual functions (QWidget, the base class of all widgets in Qt had 51 at last count), giving it a more OO design than wxWidgets (which uses a more MFC-like approach using macros). What this means is fewer lines of code in general when using Qt, but faster execution speed when using wxWidgets (although the degree to which this occurs depends on whom you ask). Qt is used by IBM and Borland Kylix (discontinued): this should yield more reliability. However, it is rumoured that wxWidgets will be used in the next version of C++BuilderX. Qt has a full-featured embeddable GUI (Qt for Embedded Linux) based on GNU/Linux with framebuffer. This means that once you have Linux with /dev/fb you are ready to run examples with no additional pains. Qt for Embedded Linux has a small footprint compared with X11. There are numerous IDEs for Qt, QtDesigner, QtCreator, QDevelop, Edyuk as well as integrations with popular IDEs such as Visual Studio, Eclipse and XCode (though there are also several IDEs for wxWidgets). Qt offers reliable commercial support (but so does wx, see http://www.wxwidgets.org/support/support.htm) There is nothing to stop somebody writing a Qt-based implementation of wxWidgets, though wxWidgets applications can already be made to appear Qt-ish using wxGTK and GTK-Qt (this doesn’t work too good, though).
First of all running automation of Internet Explorer with Flash Content on a 64 bit OS is not easy because by default the OS will launch 64 bit version of Internet Explorer instead of the 32 bit version.
Products affected You might be on this page because you can't view content with the Flash Player. This is likely because your computer is running a 64-bit Web browser on a 64-bit operating system and you are trying to install Flash Player. Flash Player does not run in most 64-bit browsers. If you attempt to download the Flash Player in a 64-bit browser that does not support Flash Player, you will see a message from Adobe and a link back to this page. To install Flash Player, use a 32-bit Web browser on your 64-bit operating system. All major browsers are available in 32-bit versions and the Internet Explorer 32-bit browser is the default browser on Windows 64-bit systems.
There are two InternetExplorer.Application objects on x64-bit systems, one for x32 bit, the other for x64. By default, the x64 bit version is launched when you call the object, because by default the x64 bit wscript.exe is used. But you can also launch the x32 bit version of the object by using the x32 bit version of wscript.exe and passing the vbs url to it as an argument:
The same works for all other x32 bit ActiveX objects in case you have to use them.
If you are using CoCreateInstance() of CLSID_InternetExplorer (to obtain an out-of-proc instance of iexplore.exe), you can pass one of these new flags in the dwClsCtx field to control which kind of server (32-bit or 64-bit) you get:
CLSCTX_ACTIVATE_32_BIT_SERVER = 0x40000, // Pick 32 bit server over 64 bit server CLSCTX_ACTIVATE_64_BIT_SERVER = 0x80000 // Pick 64 bit server over 32 bit server
Activideo is a software created by a small company Actimus which can help you generate all what you need to produce the raw data needed for an interactive video experience. For more information about Activideo visit http://shop.actimus.com/ and to see how it work visit http://shop.actimus.com/demo/howitworks/. Some video tutorials are now available to explain you how to use Activideo http://shop.actimus.com/demo/tutorials/ and user who purchase the software have access to online documentation.
Activideo is a fast and easy way to turn your videos into interactive presentations thanks to the export of well known Adobe XMP Metadata container. Activideo adds interactive hot spots (also called overlay sequences) to your videos. It is a simple but powerful concept: user-created hyperlinks within the video at various intervals and for specific areas in the video the same way hypertext is used on the Internet. These hyperlinks and interactive hotspots are exported into Adobe XMP RDF XML file format. Activideo could also produce Adobe Flash Action script 3 file along with a FLA and HTML template to be able to build your custom SWF with Adobe Flash CS4 or Adobe Flash CS5 thanks to a Plugin SDK. Actimus is about to release a live component for Flash CS5 which will provide the ability to validate/test each invisible hotspot by playing the video inside the Activideo Player.
Input Formats:
Activideo supports many input video file formats mostly any file format supported by the Direct Show software stack. Today, it currently supports MPEG1, MPEG2*, MPEG2-TS* transport streams including HD (720, 1080), DivX*, Microsoft AVI, Microsoft WMV* and WMV-HD *, Blueray * m2ts file, MKV, FLV and should work with WEBM (VP8). Activideo never modifies the original source video neither encode a Video. This tasks is left to Adobe Media Encoder and Adobe Bridge CS4 bundled with Adobe Flash CS4 Pro
Overlays:
The outlining of the overlay sequences is very precise because Activideo supports polygons with up to 100 vertices within a sequence. It performs linear interpolation of each vertex to transition smoothly from one shape to another. While the video is playing into Activideo, the user can move the current polygon location with the mouse visually to match any portion of the video associated and covered by polygon (and polygon are not visible on top of the final encoded Video. This is a human intervention process but it can be automated if the user doesn't plan to move the object on screen thanks to a very functional Wizard well suited to create a unique sequence and for example turn a logo encoded in the video into an hyperlink. To ease the overlay authoring process, a static logo sequence can be generate using the Creation Wizard.
Demo version: Yes : Export of XMP No : Project saving. Yes : Wizard to create an interactive sequence available. 21 days of evaluation.
Full version: Yes : Export XMP Yes : Access to self registered COM Export Plug-ins available through Export As Menu NO activation required.
DOWNLOAD QT SOURCE CODE As the option to download only the Qt source code is a bit obfuscated on the current Nokia website, please follow these directions:
Go to http://qt.nokia.com/downloads and click the Go LGPL button. Since you want only source code, look at the Qt: Framework Only column on the right. Click e.g. Download Qt libraries 4.6.3 for Windows (VS 2008, 194 MB) — choose the VS2008 one.
This starts the download for pre-built Qt. But we don’t want that as we will be building Qt ourselves. A page will appear with . Cancel the Save As dialog in your browser to cancel the binaries download you had clicked on, then click on this link, e.g. http://get.qt.nokia.com/qt/source/qt-everywhere-opensource-src-4.6.3.zip Unzip the file into e.g. c:\qt\4.6.3-vc. Please use a path with no embedded spaces, as the Qt build tools have issues with them. SET ENVIRONMENT VARIABLES Open Computer Properties | Advanced system settings | Environment Variables:
Edit environment variable to add: QTDIR = c:\qt\4.6.3-vc Edit the PATH environment variable to add: %QTDIR%\bin Either close all command prompts and Visual Studio instances, or reboot... the computer so the new command-line takes effect. BUILD VC++ VERSION OF QT Open a Microsoft Visual Studio 2008 Command Prompt, which is a command console with environment variables set for the specified VS. This is easily accomplished using Start | All Programs | Microsoft Visual Studio 2005 (or 2008) | Visual Studio Tools | Visual Studio 2005 (or 2008) Command Prompt. Cleanup any previous build: c:\> cd c:\qt\4.6.3-vc c:\qt\4.6.3-vc> nmake distclean
c:\qt\4.6.3-vc> rm -rf tmp* // <– recursively remove all tmp\ folders and files I use GNU Tools or even better Cygwin. Cygwin is very useful because you can also build other open source unix source code library including complicated ffmpeg that you may want to link to your QT project. You can download the gnuwin32 package maintenance utility on the sourceforge.net project portal. Cygwin can be downloaded here
Run Configure with no parameters to see a help screen. Configure generates nmake compatible makefiles to build all the Qt DLL’s, tools, and demos.
4. Run nmake to build.
c:\qt\4.6.3-vc> nmake
It will take awhile, but this grinds through building the specified Qt DLL’s, tools, and demos with Visual Studio.
INSTALL VISUAL STUDIO ADD-IN The Qt Visual Studio Add-in is indispensible for developing Qt apps in Visual Studio. The Add-in has replaced the previous Qt Visual Studio Integration, which was only available to Commercial customers. Now the Add-in is used by both LPGL and Commercial licensees, and the Integration has been deprecated. While the Add-in does not allow integrated .ui editing (it instead launches Qt Designer to edit .ui files), it is fully supported and maintained by Nokia, whereas the Integration hadn’t been modified since the 4.3/4.4 timeframe.
Because Visual Studio Express does not allow add-ins, using these free versions of Visual Studio is not recommended for Qt development. You need at least Visual Studio Standard (Pro, Team System, etc. of course will also work).
1. Download and install the Qt Visual Studio Add-in to install the Qt plug-in into Visual Studio (both 2005 and 2008 are supported by the add-in).
2. Start Visual Studio.
3. Select menu Qt | Configure Qt Versions. Add c:\qt\4.6.3-vc.
4. Now Qt is fully functional, and you can use VS2008 to build Qt apps.
QT IN VISUAL STUDIO 1. See Qt menu item. Launch Qt Designer (the Resource editor) and Qt Linguist (the localization tool).
2. Create new Qt projects. File | New project, select Qt4 project.
3. Read Qt Help. Available from Help menu (Qt help is merged in with Visual Studio Help and viewed in Document Explorer.) Or, manually launch
1. On the command line with "qmake -tp vcapp -r yourProfile.pro"
Ensure that the QMAKESPEC environment variable is set to the appropriate value. If you use Visual Studio 2008, then win32-msvc2008 is the correct value.
To set your environment variables in Windows, please see http://en.wikipedia.org/wiki/Environment_variable Note that you may have to re-open a command window before your settings are changed. To check that your PATH is set correctly: C:\> qmake -v QMake version: 2.01a Using Qt version 4.6.3 in C:\Qt\4.6.3\lib To see if QMAKESPEC is set correctly: C:\> echo %QMAKESPEC% %QMAKESPEC% // not set win32-msvc2008 // set
2. With the Qt Visual Studio integration via the menu "Qt->Open From .pro File" and save your project to also save the visual studio solution .sln file
==================== MFC AND QT
This walkthrough covers the migration of an MFC based program, generated by Microsoft Visual Studio's MFC Application Wizard, to the Qt toolkit using the Windows Migration Framework.
The task of protecting your software from hackers is not easy. Put simply, complete and total protection - is not possible. If the hacker has access to your complete program, they can eventually break any and all protections you put in their way. This is not opinion - it is a fact. This is simply because they control the hardware at the most "intimate" level on which your program is running. As you know, a program is simply a set of instructions. Since the hacker controls the hardware on which those instructions are executed, eventually they will find the instructions in your program where your protections lie and simply change them.
A simple analogy illustrates this point: You have a lock on the front-door to your home don't you? When you leave the house, do you lock it? Of course you do. Why? You lock it because you don't want people to steal your stuff. If the door was unlocked, they would walk in and rob you. But, ask yourself, if they really wanted to get in, could they? If they had a crowbar and a chain-saw of course they could, sometimes they could simply kick in the door. If you had a great deal of valuables, you might get an alarm-system or a stronger door, but again, if they really wanted to rob you - they could. Software that resists hackers is just like a home with a locked door. You must make a reasonable attempt to keep your software safe since that will "keep the honest people honest", but at the same time, do not delude yourself into a false sense of security.
Of course - all is not lost. We recommend that, in light of this knowledge and accepting the facts as they are, instead of playing "the game" of protection with the intent to "win" (to completely stop the hackers) - we play for an impasse. Since we know that a "win" is impossible, we play the "game" for the next best thing - a tie. What we mean by a "tie" is that you should engineer your protections in such a way that:
It is as difficult, tedious and time consuming as possible for a cracker to crack. Is difficult to crack successfully or without breaking some key part of the program. If cracked, can be quickly and easily changed so the crack no longer works with the current version of the software.
What can you, as a developer, do to make your implementation of you software licensing solution as secure as possible? What can you, as a developer, do on an ongoing basis, in order to make your software as secure as possible? Anti-hacker standard practices are just that - standard. They should not be limited solely to your implementation of the licensing System and the code around it. So, in fact, the two concerns above are one and the same. Below are several simple "tricks" you should consider, that when used together, will force crackers trying to defeat your system to invest incrementally more time in doing so. When used in conjunction with the licensing System, their job will be unpleasant to say the least. Please be sure you understand that the purpose of playing the "game" is an impasse.
Here are several standard things you should do in any software you wish to protect to slow down crackers:
1 - Never give any registration or protection testing function a self describing name. Never use a function name like "IsActivated". Crackers will quickly locate these names (in most high level languages) and simply remove or rewrite them. 2 - Avoid unnecessary error messages. If your program gives an error message after an unsuccessful activation attempt, the crackers will be able to quickly locate the error message and know that at some point in the call stack immediately before it - a protection or activation-test function call failed. 3 - Wait using a timer in a separate thread to provide error messages. When an error message is unavoidable, you may wish to set a timer in a separate thread that will fire several seconds or minutes later to warn the user and take action. This makes tracing back to the protection call that caused the timer to start up more difficult and will slow the cracker down. 4 - Encrypt any and all protection strings. When an error message in unavoidable, be sure to dynamically generate the message string itself. The best way to do this is to store it in encrypted form in the binary and decrypt only immediately before you need it. This makes searching for the string very difficult. Better yet - encrypt all your programs strings. 5 - Use random tests for activation. Test that the program is correctly activated at random time intervals; hours, days or even weeks after it was first installed and run. Possibly test only after certain key functions (unrelated to activation) are used. This will often be missed by crackers and again will slow them down or make their crack worthless. 6 - Don't start the activation test for several seconds (or even minutes) after the activation. you may wish to store any Activation Codes input by the user temporarily in memory and after a brief pause try to activate them. You may even wish to require the user to restart the program before you input the value. This makes it difficult to trace and will slow the cracker down. 7 - Use CRC checksums in your application and dlls. Have your EXEs check themselves, check other DLLs, or even have them check each other. Consider computing a checksum on just a small section of the file itself instead of the whole thing - this makes the crackers job more difficult. 8 - Use Anti-Debugging tricks. Be sure you have read the Anti-Debugging section for more information on how to slow down crackers by having your software resist debuggers. 9 - Use Anti-Disassembling tricks. Be sure you have read the Anti-Disassembling section for more information on how to slow down crackers by having your software resist disassembling. 10 - Use more activation checking routines than the minimum necessary. You should test in several places, and in places where the crackers might not expect it. Check at random time intervals too (see above). One routine requires a time investment from the cracker to remove, then more routines will require even more time to break. 11 - Use Honey Pots. A "Honey Pot" is a fake or decoy routine (or set of routines) you code into your program that seem to check activation, but in fact - does nothing. Have it write and read registry keys, manipulate files, jump all over in memory computing useless values and doing meaningless comparisons. Use your imagination here. Name honey pots to draw the crackers attention (like "CheckReg"). The point is to waste their time with a ruse. 12 - Wrap Activation testing routines in ridiculously long code. Consider using several long procedures which do a huge amount of unnecessary (but seemingly meaningful) processing. At some point during this useless processing, legitimately check the activation. Consider even checking it two or three times in different ways. This make the crackers job of tracing through this giant jumble of assembly looking for the "real" code a more frustrating experience. This will slow them down. Your testing routines can safely take 5 to 20 seconds to execute on a reasonably fast machine. 13 - If you use a demo version of your software with limited features, make sure you don't have "grayed out" buttons or menu options. A cracker can simply change the enabled property of these controls which will effectively make your features visible again. It is always preferable to dynamically create these controls only when they are available. If you use a demo version of your software with limited features, consider not distributing the actual binary code to execute those functions. The simplest way to do this is to include the "paid version only code" inside a DLL which is called from your program when it is legitimately purchased. Then when a customer purchases your software, give them an Activation Code to release your software protections as well as the required DLL containing the code for the missing features. 14 - If your program has been cracked, release a new version. This is probably the most important principle which makes all the above tricks worth while. Once you have wasted the crackers time as much as possible, slowing them down with all these tricks (and others you may think up yourself), you must immediately make all their hard work go to waste - release a new version fast. Change a few things around, re-organize the code, update the version number, test - and re-release. The cracker will have to start all over again. Reaction time is important too. Expect to move quickly if a crack is released. Try and release a new version as rapidly as possible to maximize the frustration effect.
cyclic redundancy check
A CRC (cyclic redundancy check) is a numeric value computed from some source (file, string, digest, etc). Unlike encryption, a CRC value is always the same size regardless of the source size. A CRC is also commonly referred to as a hash or a checksum.
There are numerous sources on the internet for information on what a CRC is, so the algorithms wont be discussed in depth here. Regardless - it may be preferable from a security standpoint for you to develop your own CRC algorithm variation based on a well-known cryptographically secure one.
A CRC can be used to help slow down hackers by computing a CRC checksum of some file (on Windows your EXE or a DLL) and comparing the computed value with a stored value from a known and trusted source. If any of the instructions have been changed, the CRC checksum will not match.
This can be used by your software team in a couple ways to slow down the crackers:
Trojan Server Attack
A cracker may try to replace the DLL (in case of COM with a Trojan COM server with the exact same interface but whose functions always returns true values). You can use a CRC value to attempt to defeat this attack: The basic premise is:
On Windows Operating Systems, read from the registry the location of the DLL based on the known GUID of the COM server you want to check. If that file exists, calculate a CRC checksum on it. (Any CRC or hashing algorithm can be used - it doesn't matter). Compare the checksum calculated against your known checksum which you have previously computed on a trusted copy of the COM server. Take action depending on the match. Perform a CRC check on the dll every time your program starts but before you actually use the system. Check the return value of the CRC check on the dll against a value you store inside your program. If they are not the same - the dll has been swapped, damaged or altered. To make this even more secure have the value inside the program you check against be stored in three different places, and assemble it just before you use it. A C++ example follows where, at development time, you have already run your CRC function on a trusted copy of the dll file and you know it should return a value of 3070908778 :
char buffer1[25] = {'\0'}; char buffer2[25] = {'\0'}; const char * val1 = "778"; // declared in a different module somewhere const int val2 = 3070; // declared in a different module somewhere static int val3 = 908; // maybe read from the registry where your installer wrote it.
You can even implement or use you own version of itoa, atol and strcat
CRCChecks can be quite simple to implement. We suggest that you use your own CRC to ensure that it is original.
Binary Instruction Replacement Attack A cracker may simply replace the protection calls in your program to do nothing - ignoring the COM server altogether. In fact - this is a very common attack used by most crackers. You can use a CRC value to attempt to defeat this attack:
All 32-bit executables have a CRC checksum field in their programs PE header. You can force your compiler to generate this checksum. Then, using the Win32 API MapFileAndCheckSumA() you can get both the computed checksum and the stored one. Then simply compare them. This of course only works if the cracker doesn't change the stored one, but can sometimes be effective. There are many more sophisticated approaches to using CRCs in your program to detect the integrity of both itself and external modules (dlls) but they are beyond the scope of this help file.
You may even wish to consider computing the checksum on just a small section of the file itself instead of the whole thing - this makes the crackers job more difficult. Don't just have EXEs and DLLs check themselves, have them check each other.
Anti-Debugging
Debuggers are tools just like your IDE that allow crackers to trace a programs execution as they are running - instruction by instruction.
There are numerous anti-debugging tricks that are documented in books and on-line, but all approach the problem from two specific angles:
They attempt to detect any debugger that is currently attached to the process or running in the background.
They attempt to detect specific debuggers (like SoftICE and others).
Protected software should use some sophisticated techniques to protect you from debuggers in both these ways, However, this is only effective when the Binary/DLL methods are actually called to perform some action. To be even more resistant you should consider implementing anti-debugging tricks of your own.
There are simply too many well-documented ways to detect specific debuggers (like SoftICE) available to discuss them here. Many of them are very complex to implement or are ineffective. Instead, we suggest you make at least a simple attempt to detect debuggers. The simplest way to do this is with the Win32 API function call "IsDebuggerPresent". Although this is relatively simple to replace by most crackers, and only works on Windows NT, 2000 and XP, placing it in various unexpected locations in your program can sometimes be quite effective at slowing them down.
Anti-Disassembling
Disassemblers are tools crackers use to translate application code back into assembler or even a higher level language. There are several disassemblers on the market of various quality. Some even write comments on the translated code, which makes it easier for the cracker to understand.
Since the purpose of disassembling is to understand the programs code, a good way to counter disassemblers is to make it more incomprehensible internally. The simplest way to defend against disassemblers is to insert numerous small bits of code in between the legitimate program code instructions that do nothing meaningful, but appear to, and are complex to understand.
A simple way to do this is to define a number of anti-disassembling macros and inline functions. Use your imagination to write these macros and functions. Do lots of pointer arithmetic and mathematical transformations. Conditionally and unconditionally jump all around in memory. Make sure your anti-disassembling routines are macros or inline functions so the anti-disassembling code gets pre-processed and duplicated everywhere it is placed (instead of a simple function call which can be found and replaced in a single location by a cracker).
Then, sprinkle these macros and functions liberally around areas of your programs you wish to protect from disassembling. Increase the density of the routines around sensitive areas. Naturally this will increase the footprint of your binary and can potentially impact performance so use this trick very wisely. You may wish to reserve its use for areas only around your protections and licensing code.
The more you can make the crackers job tedious, the more time he will have to invest in cracking your software - which is the ultimate goal - to slow them down as much as possible.
The Qualcomm Snapdragon platform continues to generate robust industry attention to accompany its steadily expanding customer base. At the recent COMPUTEX 2010 show, Qualcomm unveiled the sampling of the third generation of its Snapdragon platform – namely its first dual-CPU Snapdragon chipsets consisting of the MSM8260, MSM8660 and QSD8672 products that feature enhanced dual cores that can run at up to 1.2GHz and 1.5GHz respectively, and are targeted at the high-end smartphone market area (the third generation Snapdragon platform is expected to support commercial products by the end of 2010). The new third-generation Snapdragon products complement its first-generation QSD8x50 1GHz core product and the second-generation MSM8x55 and QSD8x50A products with 1GHz enhanced core, including multimedia optimizations and 1.3GHz enhanced core respectively.
The Snapdragon platform can be viewed as competing within the mobile application processor market segment (also referred to as the mobile multimedia processor market segment). Today the application processor segment includes IC platforms that typically integrate the application processor core along with additional functions such as baseband modem andwireless connectivity functions onto a single system-on-a-chip (SoC); this includes the Qualcomm Snapdragon. The application processor market also consists of IC platforms that exclude integration of baseband modems (e.g., TI’s OMAP 4). The application processor platform segment addresses a wide range of mobile devices including smartphones, mobile Internet devices (MIDs), netbooks and portable media devices. By its nature, the mobile application processor market segment attracts a wide swath of competition from the top-tier mobile silicon players, including Samsung, Apple, Intel and TI. Due to Qualcomm’s historically solid competitive foundation, based heavily on its CDMA chipset royalties, and the burgeoning traction of the Snapdragon platform (in over 140 device designs), it presents a mounting competitive challenge and thus generates the key issue of how the competition can position against the overall Snapdragon platform. Perspective Current Perspective The Snapdragon platform has been commercially available since Q4 2008 through the QSD8650 and QSD8250 first generation product offerings. From its inception, Qualcomm positioned the Snapdragon platform as an innovative breakthrough offering since it uses the in-house custom developed Scorpion CPU as the core application processor based on the ARMv7-based Cortex-A8 core. This approach has enabled Qualcomm to engineer improvements over standard off-the-shelf ARMv7-based Cortex-A8 processors in areas such as power consumption (e.g., the first Scorpion processor required 150 mW less power consumption at 600 MHz than the non-customized ARM equivalent and so on) as well as optimizing the processor design for the low-power (LP) process. As a result, the Snapdragon platform has proven a stalwart in the smartphone application processor market, as evidenced by the Snapdragon platform’s incorporation in over 140 device designs that include mobile devices that range from HTC’s Droid Incredible and Nexus One smartphones to Huawei’s S7 tablet, to name a few.
For the first generation Snapdragon QSD82x0 products and the second generation Snapdragon MSM8x55 and QSD8x50A products, Qualcomm shares platform and product metrics in areas such as core processor clock speed/performance, flexible wireless connectivity functions, HD video/3D/display/camera support and O/S versatility. This gives rivals a wide range of product areas to seek selective differentiation against the Qualcomm Snapdragon platform, although Qualcomm is hardly unique in that regard.
The topic of core processor clock speed and performance, for example, represents a straightforward and intuitive product area for rivals to assert competitive differentiation. The Snapdragon platform’s first-generation QSD8x50 supports a 1GHz core processor while the second-generation MSM8x55 and QSD8x50A products support a 1GHz enhanced core, including multimedia optimizations and a 1.3GHz enhanced core respectively. In contrast, Intel asserts that its x86 processor-based Moorestown platform via the Atom Z6xx processor series can support up to 1.5GHz clock speed for smartphone devices and up to 1.9 GHz clock speed for tablet devices. Such metrics will still match the third generation Snapdragon QSD8672 product that is designed to run dual cores that operate at 1.5GHz (this product should appear in mobile devices at retail by the end of 2010). This complements Intel’s overall efforts to position its Moorestown platform as prime time ready for smartphone technology due to the improvements realized in areas such as power consumption advances in battery life spans (based on 1500 mAh batteries) in support of 1080p/720p video (e..g, up to four hours for 1080p video) and browsing applications as well as multi-fold improvements gained in Java script, Web page, graphics and video performance. This includes up to fourfold Java script performance improvement and at least a doubling of Web page download performance and graphic performance in relation to the Qualcomm Snapdragon platform as well as wielding the industry’s only across-the-board support of 1080 HP/MP/BP 30 fps and 720 HP/MP/BP 30 fps video capabilities. Intel’s overall R&D investment and marketing blitz on behalf of the Moorestown platform is certainly targeted at Snapdragon, as well as advancing Intel’s longstanding ambition to promote the x86 processor architecture as a viable alternative to the ARM processor architecture that dominates the mobile device silicon market today. Intel hopes to play a more prominent role within the overall mobile device silicon market beyond netbook silicon. There is a bit of irony here as Intel is looking to use the Intel Moorestown platform to attack the ARM-centric Snapdragon platform in Qualcomm’s backyard of smartphone and tablet silicon, while Qualcomm is developing the Snapdragon platform to help more directly challenge Intel’s prominence within the netbook silicon segment.
Apple, Samsung and TI are Qualcomm rivals that also use the customization of the ARMv7-based Cortex-A8 processor to achieve select advancements over the standard ARM offering. Samsung and Apple currently have a strange bedfellow arrangement that can influence how they position their respective platforms against the Snapdragon platform. Samsung collaborated with Intrinsity in developing and introducing its 45nm-based Hummingbird platform during 2009. In April 2010, it was revealed that Apple acquired Intrinsity in stealth mode to lock up the FastCore intellectual property (IP) that was instrumental in realizing the iPad A4 processor’s enhancements to standard issue ARM Cortex-8 core processor technology (e.g., achieving 1 Ghz clock speed on a 45nm process). Through the acquisition, Apple can promote that its A4 processor development efforts are dedicated exclusively to the support of Apple products such as the iPad and iPhone, and the company can avoid the dissipation of processor engineering resources that its rivals, such as Qualcomm, are obliged to perform through the open-ended support of multiple OEM products. Samsung should look to further elucidate its plans to license the Hummingbird technology to other mobile device vendors and what if any impact this has on its Apple relationship. The Apple acquisition of Intrinsity does not change the fact that Apple’s A4 technology remains based on Samsung’s 45nm SoC technology and Samsung continues to have access and wield the Hummingbird IP gained from its joint collaboration with Intrinsity prior to the Apple acquisition of Intrinsity.
Samsung continues to register significant product development and marketing advances with its Hummingbird SC5PC110 processor. The Hummingbird S5PC110 runs the Samsung Galaxy S smartphone, which Samsung asserts will launch in an astonishing 110 countries. One area the Samsung can assert clear product differentiation against Qualcomm is in the area of 3D graphics. The S5PC110 processor can scale up to support 90 million triangles per second. In contrast, the Qualcomm QSD8650 delivers only 22 million triangles per second while the pending QSD8672 will do up to 80 million triangles per second. Additionally, in the related area of 2D graphics rendering, Samsung’s S5PC110 product can support up to one billion pixels per second while Qualcomm’s QSD8650 supports only 133 million pixels per second and the upcoming QSD8672 product still comes up short against Samsung with an improved 500 million pixels per second.
TI’s OMAP 4 platform using the OMAP4440 processor is slated to support mobile device products that will hit retail in late 2010/early 2011. The OMAP processor series is already found in well-known mobile handset products such as the Nokia N-series, the Motorola DROID, and the Palm Pre. However, OMAP 4 dual core clock speeds are limited to just 1 GHz, and that’s for a product that is not yet in generally available mobile products. In this regard, OMAP 4 only ties the Qualcomm Snapdragon’s first generation 1 GHz product and trails both the second and third generation 1.2Ghz-1.5Ghz products. However, TI has already staked out a competitive position against Qualcomm in this area showing how apples-to-apples comparisons can prove dicey at times in the mobile silicon space. TI asserts that the OMAP 4 can deliver improved resolution display and still image metrics in relation to the Snapdragon platform, despite the core processor clock speed differentials. For example, the OMAP 4 can deliver 20-megapixel camera support while the QSD8x50 product can only handle 12-megapixel cameras. Moreover, TI advocates the OMAP 4 platform will prove more flexible in hardware support of future video codecs in relation to the Snapdragon platform. TI will also invoke that its OMAP4440 processor will use the ARM Cortex-9 architecture, which can yield performance improvements over ARM Cortex-A8 products (up to 30 percent according to ARM) and more flexible dual core power management arrangements.
Overall the most serious long-term competitive threats to the Qualcomm Snapdragon platform within the smartphone and tablet application processor market will prove to be the major mobile silicon players such as Samsung, Apple and TI, as well as Intel, who already possess competitive application processor platforms targeted specifically at smartphone, MID and tablet products. Mobile silicon rivals such as Marvell, Freescale, NVIDIA and ST-Ericsson all sport viable mobile application processor platforms but need to prove they can move the market needle more within the mobile application processor market segment to mount a serious challenge to Qualcomm in the evolving smartphone/tablet silicon market segment. Marvell and Freescale have achieved market distinction within the ereader niche, for example, but are not able to match the Snapdragon’s presence in over 140 device design wins. Samsung, Apple, Intel and TI all possess the product differentiators in areas such as core processor clock speed/performance, power consumption metrics, and HD video/3D/display/camera video performance and the global channels to challenge the Snapdragon’s early market prominence in this area into the foreseeable future. Recommended Actions Vendor Actions • Mobile application processor vendors that target emerging 4G/LTE silicon devices should consider getting out ahead of the market in explaining how their platforms optimally complement the region-sensitive E-UTRA LTE bands (TDD/FDD modes). In general, mobile application processor vendors should posit the 4G/LTE market represents a new level playing field in the market as Qualcomm’s dominance in the CDMA/3G silicon market will not directly translate into the same type of dominance within the 4G/LTE space.
• Mobile application processor vendors should note that they generally rely on third-party partners to supply fundamental mobile silicon components such as baseband modems and RF transceivers to complement their application processor platforms while Qualcomm uses integrated in-house baseband modem and RF transceiver components as part of the Snapdragon offering. This provides some latitude in asserting that they can select best-of-breed components in these areas and have more supply chain flexibility in relation to Qualcomm’s single vendor approach.
• Intel should continue to pointing out that the smartphone/tablet market is still in its developing stages, which gives Intel ample opportunity to capitalize on new market opportunities in this fast growing segment. This includes pointing out that the Atom Z6xx series is already in the advanced demo stage in smartphones with 3.8”+ displays and ~15mm thin tablets and the x86 platform supports rising mobile O/Ss such as Android and MeeGo. User Actions • Smartphone and tablet OEMs need to test and contrast the Intel Atom Processor Z6xx series (prior codename Lincroft SoC) against competing ARM-based mobile device SoCs, such as Qualcomm’s Snapdragon platform, due to factors such as its compact package (i.e., 13.8x13.8x1.1mm with 0.5mm pitch), support of 19 power islands with on-die clock and power gating, new ultra low-power states (i.e., SOi1, SOi3), and the leveraging of Intel’s Hi-K 45nm LP SoC process.
• Smartphone and tablet OEMs should investigate the new OS power management (OSPM) capability that accompanies the overall Moorestown platform. This includes support of integrated PMUs, software-based OS power management options, and fine-grain power management functions that create power islands for sub-systems (i.e., power is only allocated to the application running and not dispersed to idle applications, etc.) and factor in such capabilities in seeking apples-to-apples validation of Intel’s power conservation claims on behalf of the Atom Moorestown platform in relation to the Snapdragon platform
If you're running Windows this is a standard installer file, just follow the on screen instructions for installation.
2. Eclipse Install the Eclipse IDE for Java Developers from http://www.eclipse.org/downloads/. This a ZIP archive file, extract the folder “eclipse” for me I extracted eclipse under C:\eclipse . Most other flavors of Eclipse (like Aptana or platform specific builds) will also work, provided that you install all the necessary Eclipse plug-ins.
Extract the downloaded archive and place it somewhere you'll remember like C:\sdk\android-sdk-windows and add the tools sub directory to your environment PATH. Additional information and instructions for adding the Android SDK to your PATH can be found at: http://developer.android.com/sdk/installing.html
Be sure to do the following (WINDOWS): Add android SDK to your Path Add android sdk tools (\android-sdk-windows\tools) to your path. This is necessary for ruby to find the command "android create project" later on.
11. Once the phonegap app has been generated launch eclipse
To load eclipse and be able to see the workspace location use the -showlocation parameter
c:\eclipse\eclipse -showlocation
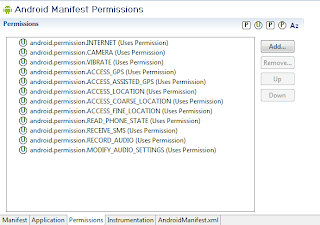
12. Next is to import the generated project in eclipse, fix any compilation errors, include the phonegap jar in your project build path and finally edit AndroidManifest.xml otherway you are going to see few crashes when trying to access lower level java class
13. When your app will build with no error, you can run the application in the debugger or in the emulator.
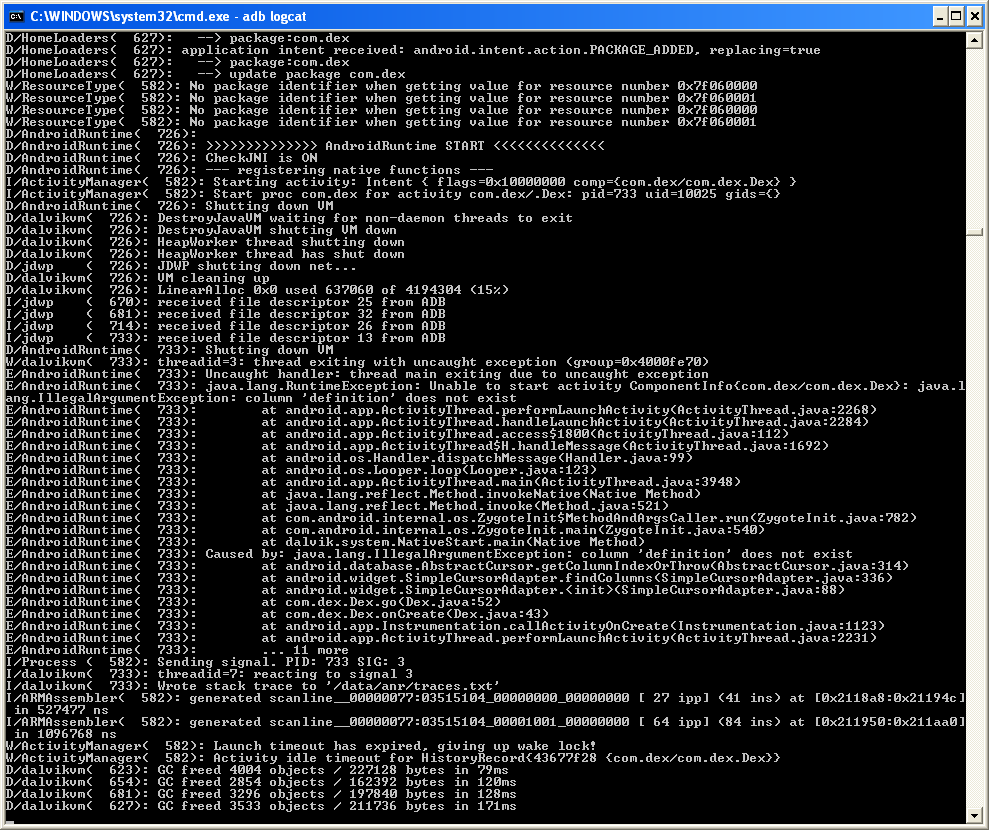
To view the android log (emulator) open a shell (usually the same one than the one used to lauch eclipse and run
abt logcat
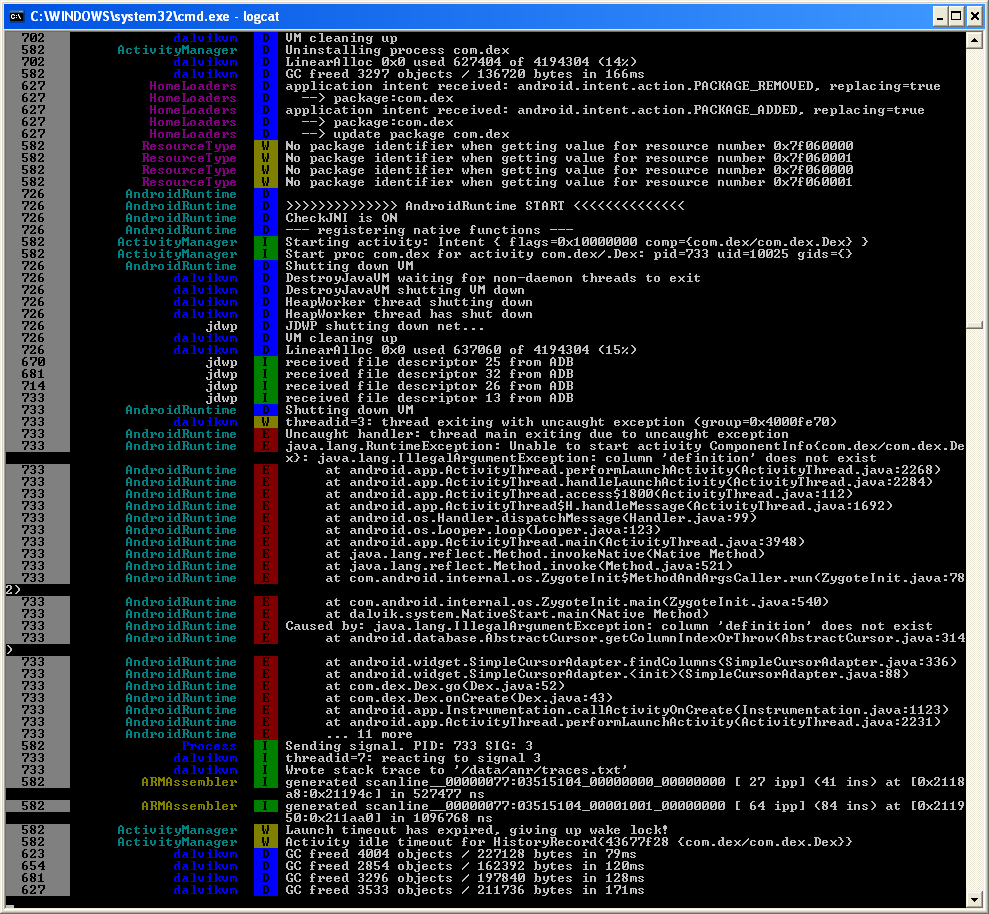
If you want a nicer logcat output you can use some very cool python script to output the android log in color !!! Install python first from here
As you can see, the colored adb logcat is a huge improvement.
To easily use the code, copy the files color_console.py, coloredlogcat.py and logcat.bat to your Android SDK/Tools path like c:\android-sdk-windows-1.5_r3\tools\logcat.bat. Now, instead of running "adb logcat" just run "logcat".
To install APK applications on your Android phone do the following:
Copy the APK file you want to install to your phone's memory card and insert the card into your Android phone. Go to Android Market and search for the Apps Installer application. Open it and click on the Install button. After it is installed, just open it. It will show you all the APK files stored directly in the root directory of your memory card. Just click on the application you want to install and it will be installed.
Using the Android SDK and USB driver
There is one more method that can be used, you can install APK files into your phone using the Android SDK. Download the Android SDK.
First of all, install the Android SDK on your computer. You will also need to install the Android USB drivers to connect the SDK to your phone via USB. You can get instruction on how to install it from here
To install applications from other sources, you also need go to Settings -> Application Settings and enable Unknown Sources. Also go to Settings -> SD Card and Phone Storage -> Disable Use for USB Storage. You can enable it again later.
Next, just open Command Prompt and type: adb install path/file.apk
where path is the full path to the APK file and file is the name of the APK application file. Your application is now installed. This is all you need to do, now just open the application on your phone and use it.
Concerns about patents and licensing have prevented some browsers from supporting H.264; this in turn has prevented the HTML5 spec from requiring support for a standard format. We believe the web needs an open video format option. One that not only helps address the licensing concerns, but is also optimized for the unique attributes of serving video on the web. To that end, we’re excited about the new WebM project. Google is open sourcing and contributing the VP8 codec to the WebM effort. Google, Mozilla, and Opera have all committed to support WebM, and we have already started making YouTube videos available in the WebM format. Adobe has also committed to support VP8, the video codec for WebM, in an upcoming Flash Player release.
Tons of html 5 video sample are available at http://oggtv.com/ mostly ogg
You’ll probably already have read up on and experimented with the new HTML5 video element, which allows us to include video inside an HTML page without the need for plugins (if not, read our Introduction to HTML5 video before going any further.) You’ll probably also be aware that there is somewhat of a disagreement over codecs going on. Opera and Firefox currently support the Ogg Theora video codec, while Safari supports the H.264 codec. Google Chrome supports both, while Microsoft have announced support for H.264 in IE9. This is not ideal, as to implement a cross-browser video with HTML5 you would need to encode and reference multiple video formats. For example:
Enter WebM Help is just around the corner — Google has released the VP8 video codec and WebM container format under royalty-free terms, with the aim of making a high quality, open video format available across different browsers and platforms. This was announced publicly at the 2010 Google I/O conference. Opera has created an experimental WebM-enabled build, which you can play with today.
It is clear that Adobe now needs to integrate webm support in Flash Player and FLash Media Server ASAP.
How:
by providing the user the ability to decide on various fallback
If your browser supports it, HTML5 video is used. If HTML5 video is not supported, Adobe Flash is used. Finally, if all else fails, a placeholder image is shown This is all done without JavaScript and requires only two video encodes, one OGG file, and one MP4 file.
It’s compatible with HTML 4, HTML5 (valid markup), XHTML 1 and additionally also works when served as application/xhtml+xml
Ensure your server is using the correct mime-types. Firefox will not play the OGG video if the mime-type is wrong. Place these lines in your .htaccess file to send the correct mime-types to browsers AddType video/ogg .ogv AddType video/mp4 .mp4 AddType video/webm .webm
Now I am wondering how Microsoft is going to handle ism file format and how non microsoft browser are going to respond. The fallback mecanism should work with IE9 and support ism file format.
Tom Krcha (platform evangelist at Adobe) has a bunch of stuff on his website about RTMFP. lately he's been focusing on some of the new advanced topics, like RTMFP Groups, but he has materials covering the spectrum of P2P topics. I went to https://afcs.acrobat.com/ and sign up to test RTMFP with Flash Builder 4.0. The video tutorial are fantastic and the COCOMO SDK is very complete and fully loaded with MXML sample.
Few interesting articles:
http://www.flashrealtime.com/basics-of-p2p-in-flash/ http://www.flashrealtime.com/ . http://www.ealeyes.com/ articles and tutorials on using RTMFP http://www.adobe.com/devnet/flashmediaserver/articles/p2p_rtmfp_groups.html
When using the COCOMO sample avoid basic and simple authentication which hardcode the login and password inside the MXML. Instead take advantage of authentication using hash.
QuickTime 7.x QuickTime 7 represents one of the largest architectural changes to the QuickTime lineage since its first version Initially released on April 29,2005 in conjunction with Mac OS X v10.4 (for version 10.3.9 and 10.4.x), QuickTime 7.0 featured the following: • Improved MPEG-4 compliance • H.264/MPEG-4 AVCcod ec • Core Graphics (Quartz) for screen drawing, allowing for live resizing and playback on an OpenGL surface • Core Audior eplacin g Sound Manager, supporting high resolution sound • Support for using Core Image filters in Mac OS X v10.4 on live video, also known as Core Video • Support for Quartz Composer (.qtz) animations • Support for distinct decode order and display order • The QTKit, aCocoa framework for QuickTime After a couple of preview Windows releases, Apple released 7.0.2 as the first stable release on September 7, 2005 for Windows 2000 and Windows XP. Version 7.0.4, released on January 10, 2006 was the first universal binary version. But it suffered numerous bugs, including a buffer overrun, which is more problematic to most users. Apple dropped support for Windows 2000 with the release of QuickTime 7.2 on July 11,2007. The last version available for Windows 2000, 7.1.6, contains numerous security vulnerabilities. Apple has not indicated that they will be providing any further security updates for older versions. QuickTime 7.2 is the first version for Windows Vista.
Apple dropped support for Flash content in QuickTime 7.3, breaking content that relied on Flash for interactivity, or animation tracks and those feature were removed from Flash CS4 on Adobe's side. Security concerns seem to be part of the decision. In QuickTime 7.3, a processor that supports SSE is required. QuickTime 7.4 does not require SSE. Unlike versions 7.2 and 7.3, QuickTime 7.4 refuses to be installed on Windows XP SP1 system (its setup program checks if Service Pack 2 is installed). QuickTime 7.5 was released on June 10,2008.
QuickTime X QuickTime X (pronounced Quicktime Ten) is the next version of QuickTime. It was announced at WWDCon June 9, 2008. It will ship with Mac OS X v10.6 in mid-2009. It will be built upon media technology first used in iPhone OS and will have support for modern codecs and more efficient media playback. Creating software that uses QuickTime QuickTime consists of two major subsystems: the Movie Toolbox and the Image Compression Manager. The Movie Toolbox consists of a general API for handling time-based data, while the Image Compression Manager provides services for dealing with compressedr aster data as produced by video and photo codecs. Developers can use the QuickTime software development kit (SDK ) to develop multimedia applications for Mac or Windows with the C programming language or with the Java programming language (see QuickTime for Java ), or, under Windows, using COM/ActiveX from a language supporting this. The COM/ActiveX option was introduced as part of QuickTime 7 for Windows and is intended for programmers who want to build standalone Windows applications using high-level QuickTime movie playback and control with some import, export, and editing capabilities. This is considerably easier than mastering the original QuickTime C++ API.
QuickTime 7 for Windows introduces a completely redesigned COM/ActiveX control that is fully scriptable from Visual Basic, C#, JavaScript, C++ and other applications that can host COM objects. This means that its even easier for Windows programmers to build standalone Windows applications that use QuickTime without needing to master QuickTime’s C/C++ API. Fully scriptable using either JavaScript or VBScript, automating your QuickTime workflow just got a whole lot easier.
For example, if your Windows server can run a Visual Basic, C# or a JavaScript application that uses QuickTime, you have the ability to create custom QuickTime content dynamically for delivery via the Web. As long as your clients have QuickTime installed, your content will work with Windows and Mac clients, Internet Explorer and non-Internet Explorer browsers.
QuickTime 7 for Mac introduced the QuickTime Kit (aka QTKit), a developer framework that is intended to replace previous APIs for Cocoa developers. This framework is for Mac only, and exists as Objective- C abstractions around a subset of the C interface. Mac OS X v10.5 extends QTKit to full 64-bit support.
QTKit is also the name of an open-source wrapper around QuickTime that was made outside of Apple. For information on that wrapper, http://sourceforge.net/projects/qtkit/.
On June 18 2010, Microsoft released Beta 2 of the Microsoft IIS Smooth Streaming Format SDK 1.0.
The IIS Smooth Streaming Format SDK provides application developers the capability to mux encoded video and audio elementary streams into Smooth Streaming fragmented-MP4 format that is compliant with the Smooth Streaming Format and Protected Interoperable File Format (PIFF) specifications. The IIS Smooth Streaming Format SDK includes a native C++ static library that can be linked into your applications to support the muxing of fragmented-MP4 into files or sent live via HTTP POST to a server running Internet Information Services (IIS) 7.0 and IIS Media Services 3.0 and IIS Media Services 4.0 Beta 1. The SDK is available for download here.
The primary purpose of the IIS Smooth Streaming Format SDK is to enable developers to create applications that can generate PIFF compliant Smooth Streaming formatted fragmented-MP4 files for use in video-on-demand and live streaming scenarios. In addition, the SDK can be used to encrypt content using standard AES encryption as required by the PIFF specification (this SDK only supports the PlayReady specific protection headers).
It is expected that the video and audio encoding functionality is done externally from the SDK. Encoding for VC-1 can be accomplished by using the Microsoft VC-1 Encoder SDK – Professional. If you wish to do H.264 encoding, you will need to acquire a 3rd party H.264 encoding SDK and AAC audio encoder. There are lots of encoding library choices available both free and commercial.
The components of the SDK include:
1. A static-linked packaging library ssfsdk.lib, along with appropriate header files, that delivers f-MP4 wrapping capability to an application for use with the following video and audio codec combinations: * Closed GOP encoded VC-1 with Elementary Stream Sequence Headers and WMA Pro, or WMA audio * H.264 (AVC1 closed-GOP streams only with IDR frames at the first sample of a GOP – must not be an Annex B stream. PPS and SPS NAL units are not supported in the stream) * AAC-LC audio 2. Sample source code for a basic on-demand muxing application that uses DirectShow to source from files. 3. Link to online MSDN documentation.
Updates included in the Beta 2 release of the Smooth Streaming Format SDK are:
This is in addition to the following supported features:
* Support for Protected Interoperable File Format (PIFF) 1.1 compliant fragmented-MP4 file output. * Support for ISO Base Media (ISO/IEC 14496-12:2008) spec compliance. * Support for muxing live and on-demand content. * Support for appropriate header boxes and formatting required for live streaming using IIS Media Services. * Support for AES-CTR encryption of VC-1 and H.264 encoded content for use with PlayReady licensing servers and Silverlight 4.0 or higher. * Support for writing out a compliant Smooth Streaming Transport Protocol server manifest files. * Support for writing out a compliant Smooth Streaming Transport Protocol client manifest files.
NOTE: Beta 2 includes a “Go-Live” license if you would like to use this SDK in production applications.
If you have questions on how to use this SDK in your applications, comments, or feedback on the SDK please send them to me directly or to smooth@microsoft.com.
Download the Smooth Streaming Format SDK Beta 2 here:
Compile Live555 using VS2005 Live555 is a media library to support local and streaming play media files. Its source code is easy to understand and extensible so it's suitable for doing some quick experimentals or demos. It's a cross-platform solution which supports Windows and Linux. But the original source package cannot generate the correct make file for VS2005. We need do some modification listed step by step here.
1. Modify the line "TOOLS32 = ..." in win32config to point to the VS2005 installed directory in your host machine. For example, "TOOLS32 = C:\Program Files (x86)\Microsoft Visual Studio 9.0\VC" is corresponding to my desktop's configuration. Note that I have Windows 7 64 Bit.
2. Modify the line "LINK_OPTS_0 = $(linkdebug) msvicrt.lib" in win32config to "LINK_OPTS_0 = $(linkdebug) msvcrt.lib", otherwise VS2008 will report msvicrt.lib cannot be found.
3. Run genWindowsMakefiles.cmd to generate *.mak for VS2005/VS2008
4. Modify liveMedia/RTSPOverHTTPServer.cpp to add the following code: #include #if defined(__WIN32__) || defined(_WIN32) #define snprintf _snprintf #endif
Not require with live.2010.06.11
5. Modify groupsock/Makefile.head. Change from "INCLUDES = -Iinclude -I../UsageEnvironment/include" to "INCLUDES = -Iinclude -I../UsageEnvironment/include -DNO_STRSTREAM".
6. Save the following commands into a bat file in the src directory. call "C:\Program Files (x86)\Microsoft Visual Studio 9.0\VC \bin\vcvarsall.bat" cd liveMedia nmake /B -f liveMedia.mak cd ../groupsock nmake /B -f groupsock.mak cd ../UsageEnvironment nmake /B -f UsageEnvironment.mak cd ../BasicUsageEnvironment nmake /B -f BasicUsageEnvironment.mak cd ../testProgs nmake /B -f testProgs.mak cd ../mediaServer nmake /B -f mediaServer.mak
7. run the saved bat file. Done :)
Now it's turn to debug using VS2008, because we don't have a solution file for VS2008, so we need to find another method to debug run. 1. you need to modify win32config to enable debug mode. Just comment the line "NODEBUG=1". 2. File->Open->Project/Solution to load a exe file to be debugged. 3. Debug->Step Over, it will stop at the main function entry point.
Footnotes... 1 IIS Smooth Streaming is part of the free IIS Media Services download for Windows Server 2008 and Windows Server 2008 R2 . 2 Runs on any edition of Windows Server® 2008 or Windows Server 2008 R2 including Windows® Web Server, which has a list price of $469. 3 Assumes use of Adobe Flash Media Interactive Server to support Pause, Seek, Authentication, and higher scalability 4 Requires Windows Server 2003 SP2, Windows Server 2008, Red Hat® Enterprise Linux® 4, or Red Hat Enterprise Linux 5.2. 5 Runs on any Web server. Also requires the Apple streaming segmenter – see next note. 6 The Apple stream segmenter is a utility that receives encoded MPEG2-TS and breaks it into 10 second “chunks” for delivery. This free download requires an Intel-based Mac, with a Mac Pro or an XServe having two Ethernet network interfaces recommended. 7 Full DVR features include Pause, Seek, Fast Forward (e.g., 2x, 5x playback speeds), Fast Rewind, Go To Live, Instant Replay, and Slow Motion. 8 A stateless (non-persistent) connection between server and client increases scalability and allows seamless failover or rollover between load-balanced servers. 9 Support for adaptive streaming to the Apple iPhone from IIS Media Services 4 was announced on October 18th, 2009. 10 Future support was announced Sept. 10, 2009. Proposed availability is H1 CY10 for delivery to a future version of Adobe® Flash® Player and Adobe AIR™. 11 Digital Entertainment Content Ecosystem (DECE, LLC) is a consortium of major Hollywood studios, consumer electronics manufacturers and retailers, network hardware vendors, systems integrators and Digital Rights Management (DRM) vendors chartered to develop a set of standards for the digital distribution of premium Hollywood content. 12 Real-time logging for Silverlight applications using the IIS Advanced Logging extension. 13 Encoded live streams are processed by the Apple stream segmenter. This intermediate step results in increased latency for live delivery.
It's an adaptive streaming technology combining IIS and Silverlight. The core file format is fragmented MPEG-4, where each "chunk" of video is transmitted as a moof fragment starting with a Closed GOP, via a single HTTP request. A chunk will typically be 2-4 seconds long. Audio can be either muxed into the same chunk, or be provided in a parallel series of chunks to enable multilangauge audio or what have you.
The file format used is straight-up ISO fragmented MPEG-4, using XML and SMIL manifests to indicate what bitrates in the file set and where the fragments in those file are. We're not trying to make up a new file format here; just take advantage of existing technologies in a novel way.
And we now have some sample files up that I encoded, including the media files and manifest files: http://on10.net/blogs/benwagg/Big-Buck-Bunny-Smooth-Streaming-sample-for-download/
The current samples are VC-1 and WMA 10 Pro, but we'll be supporting H.264 and AAC-LC payloads with the next version of Silverlight later in 2009.
So, if you start seeing these *.ismv files out there, just know that they're Fragmented MPEG-4 With VC-1 or H.264 for video WMA 10 Pro or AAC-LC for audio
For apple http streaming, a tool called mediastreamsegmenter will take an MPEG2 transport stream and split it into smaller size chunk. Mediastreamsegmenter documentation is available here
Here's what I have in the (default) login keychain: • A valid intermediate CA: "Apple Worldwide Developer Relations Cerfitication Authority" • A valid cert named "iPhone Developer: FirstName LastName" issued by the aforementioned CA • A RSA 2048-bit private and public key, each named "FirstName iPhone Dev Key" The keychain application is available through Application/Utilities/Keychain.app. Once your certificate has been deployed you should see under My Certificate something like iPhone Developer: FirstName LastName. So far, so good. Meanwhile, on the Program Portal, you need to: • Registered your iPod touch • Add an App ID (com.mycompany.myapp). I usually create one for each app keeping the com.mycompany the same. • Create a Development Provisioning Profile for the aforementioned App ID, device and certificate.
A Provisioning Profile is a collection of digital entities that uniquely ties developers and devices to an authorized iPhone Development Team and enables a device to be used for testing. A Development Provisioning Profile must be installed on each device on which you wish to run your application code. Each Development Provisioning Profile will contain a set of iPhone Development Certificates, Unique Device Identifiers and an App ID.
Devices specified within the provisioning profile can be used for testing only by those individuals whose iPhone Development Certificates are included in the profile. A single device can contain multiple provisioning profiles.
Click here to access the Developer Portal and then click on iPhone Provisioning Portal on the top right corner. In the ‘Provisioning’ section of the Portal, click on iPhone Provisioning Portal. Team Admins should click 'Add' on the Development tab. Enter a name for the provisioning profile. Specify which devices will be associated with the provisioning profile. You must specify a device in order for that device to utilize the provisioning profile. If a device's UDID is not included in the provisioning profile the profile and your application cannot be installed on that device. Specify which iPhone Development Certificates will be associated with the provisioning profile. You must specify an iPhone Development Certificate in order for the application code signed with that same certificate to run on the device. Specify a single App ID for the Development Provisioning Profile. Each Development Provisioning Profile can specify only ONE App ID, therefore, if you have applications requiring different Keychain access, you will need to create a separate Development Provisioning Profile for each of those applications. If you are installing a suite of applications with the same required Keychain access or have a set of applications not requiring access to the Keychain, use an App ID containing the wild-card asterisk character to build all of your applications. Click ‘Submit’ to generate your Development Provisioning Profile.
NOTE: On the Portal, the Certificate only shows as "FirstName LastName" and not "iPhone Developer: FirstName LastName".
Installing a Development Provisioning Profile All Team Agents, Admins and Members can download a Development Provisioning Profile from the ‘Provisioning’ section of the Portal after it has been created. Only those developers whose Apple device IDs and iPhone Development Certificates are included in the provisioning profile will be able to install and test their application on their device.
In the ‘Provisioning’ section of the Provisioning Portal, click the download button next to the desired provisioning profile. Drag the downloaded file onto the Xcode application icon in the dock or into the ‘Organizer’ window within Xcode. This will automatically copy the .mobileprovision file to the proper directory. Alternatively, you can drag the .mobileprovision file onto the iTunes icon in the dock or copy the file to ‘~/Library/MobileDevice/Provisioning Profiles’. If the directory does not exist you will need to create it. Click on the ‘+’ button in the Provisioning section of the Organizer window to install your .mobileprovision file. I recommend to create the Library/MobileDevice/Provisioning Profiles else after each download you will end up with all provisioning profile under you Download Folder.
Now, on to the home stretch! In Xcode 2.2.1, you must have: • REMOVED my build directory (before launching Xcode with said project - OPTIONAL) or just perform a full project clean using XCode for the project in question . • Docked/synced your iPod touch • Dragged-and-dropped your downloaded provisioning profile into the appropriate spot in the Organizer. It's not grayed out, and the profile is also in your Library in the expected location. • Chosen "iPhone Device 2.2.1" as the active SDK. • Under Targets, select your app, then picked Get Info. • Under the Build tab, verified Base SDK is set to "iPhone Device 2.2.1". For Code Signing Identity, Any iPhone OS Device, there is a value of "iPhone Developer" - fine. • Under the Properties tab (right click on Targets then select Get Info, change the Identifier to match my App ID com.mycompany.myappid. Be careful not to add any extra leading space by mistakes (EG copy past from the web) Xcode is too stupid to remove spaces.... lame...