My two favorites mini
board are
the Raspberry Pi
using Broadcom AP http://en.wikipedia.org/wiki/Raspberry_Pi
the Panda board
using TexasInstrument OMAP AP. The later was used by Google as their reference
design for Android 4.3 and used by Amazon on their Kindle Fire HD
Android 4.3 was a huge
improvement compared to its predecessor because it offers for the first time the
capability to have a full USB hub on the board. USB HUB means connecting tons of
external devices!
How exciting it is to be
able to order your own customizable Android 4.3 capable board!
In this article, I am
going to explain how you can build a custom Kernel and OS for your
Panda board and bring the board to life. I assume that you have Ubuntu
installed inside a Virtual machine or as a standalone OS.
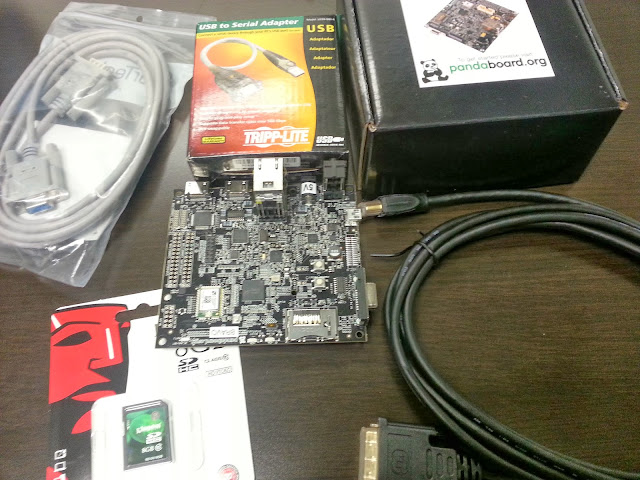
The following pictures
show you the things you will need for your panda board
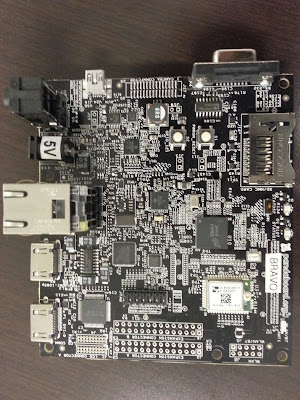
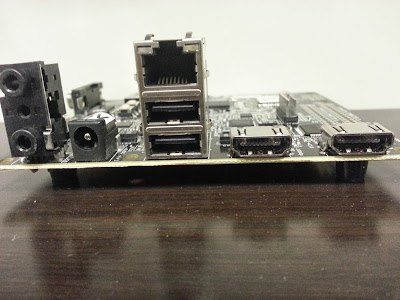
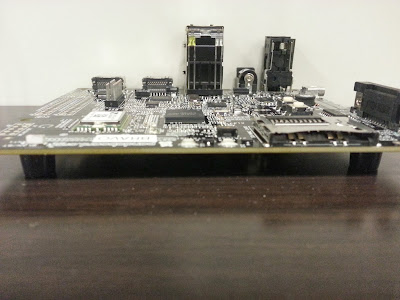
A closer look at the board
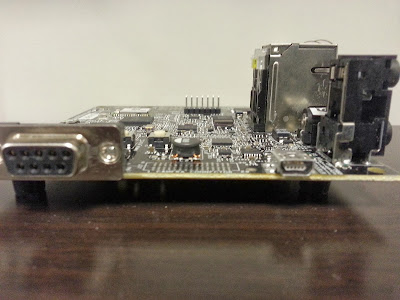
- If you are planning to connect USB device with RS232
capability, you should probably buy a USB to Serial adapter along with an
extension cable. By default the Panda kernel has a build in RS232
driver.
- You will need an HDMI to DVI cable to hook up a
monitor
- You will need a USB mouse and a USB keyboard that you
should probably connect all together to a mini USB HUB to spare one USB
connector for external device.
- You will need an 8 GB SD Card to flash the Android
Image
A Case for your Panda :)
High quality, powder
coated, scratch resistant, white steel case for the PandaBoard and PandaBoard
ES. The Pandaboard or Pandaboard ES can be easily mounted with just 4 screws. The
case also allows for the mounting of the external WiFi/Bluetooth antenna (not
included).
What is in the case box:
- White case
- Mounting screws
- Aluminium feet
- Purchased: TIGAL
A wireless keyboard for your Panda
More accesories
Update Repo
$ cd ~/
$ curl http://commondatastorage.googleapis.com/git-repo-downloads/repo >
~/bin/repo
$ chmod a+x ~/bin/repo
edit ~/.bashrc and add
path to ~/bin
Download files
$ cd /usr/local/cross/
$ mkdir android-4.3
$ repo init -u https://android.googlesource.com/platform/manifest -b
android-4.3_r2.1
$ repo sync
if you were using sudo
to execute repo make sure you change the permission of all files
recursively
chown -R
android:android *
$ cd
/usr/local/cross/android-4.3
Setup build environment
Install JAVA if
you don't have it
Installing Sun Java on Newer versions of
Ubuntu (10.04 an above)
Open the terminal and
type the following:
$sudo
add-apt-repository ppa:webupd8team/java
$sudo apt-get
update
$sudo apt-get
upgrade
$sudo apt-get install
oracle-java7-installer
That should install
the Sun Java version on your system. To change to it simply do the following in
case you have other java alternatives:
$sudo
update-java-alternatives -s java-7-oracle
If you want the
installation to be automatic type the following:
sudo echo
oracle-java7-installer shared/accepted-oracle-license-v1-1 select true | sudo
/usr/bin/debconf-set-selections
after that simply do
the following to set the default environment variables:
$sudo apt-get install
oracle-java7-set-default
Install the Oracle JDK 6 required to
build Android 4.3
Oracle themselves have the official guide to install their JDK -
below is based upon those instructions.
·
Download the 32bit or 64bit Linux
"compressed binary file" - it has a ".bin" file extension
·
Give it permissions to
execute and extract it
chmod a+x
[version]-linux-i586.bin
./[version]-linux-i586.bin
During installation it will ask you to register -
press ENTER. Firefox will open with the registration page. Registration is
optional.
JDK 6 package is extracted into ./jdk1.6.0_x directory, for example ./jdk1.6.0_30.
Lets rename it:
mv jdk1.6.0_30 java-6-oracle
·
Now move the JDK 6
directory to /usr/lib
sudo mkdir /usr/lib/jvm
sudo mv java-6-oracle /usr/lib/jvm
switch to Oracle JDK 6
wget http://webupd8.googlecode.com/files/update-java-0.5b
chmod +x update-java-0.5b
sudo ./update-java-0.5b
don't worry - 0.5b refers to the script version - not the
version of java!
Finally test the switch has been successful:
java -version
javac -version
These should display the oracle version installed - 1.6.0_30
or
run this command, which lets you choose which Java installation
to make the default:
sudo update-alternatives --config java
$ source
build/envsetup.sh
$ lunch
You're building on
Linux
Lunch menu... pick a
combo:
1. aosp_arm-eng
2. aosp_x86-eng
3. aosp_mips-eng
4. vbox_x86-eng
5. aosp_flo-userdebug
6.
full_grouper-userdebug
7.
full_tilapia-userdebug
8.
mini_armv7a_neon-userdebug
9. mini_mips-userdebug
10. mini_x86-userdebug
11.
full_mako-userdebug
12.
full_maguro-userdebug
13.
full_manta-userdebug
14.
full_arndale-userdebug
15.
full_toroplus-userdebug
16.
full_toro-userdebug
17.
full_panda-userdebug
Which would you like?
[aosp_arm-eng] 17
PLATFORM_VERSION_CODENAME=REL
PLATFORM_VERSION=4.3
TARGET_PRODUCT=full_panda
TARGET_BUILD_VARIANT=userdebug
TARGET_BUILD_TYPE=release
TARGET_BUILD_APPS=
TARGET_ARCH=arm
TARGET_ARCH_VARIANT=armv7-a-neon
TARGET_CPU_VARIANT=cortex-a9
HOST_ARCH=x86
HOST_OS=linux
HOST_OS_EXTRA=Linux-3.2.0-56-generic-x86_64-with-Ubuntu-12.04-precise
HOST_BUILD_TYPE=release
BUILD_ID=JSS15J
OUT_DIR=out
By default for panda
the kernel is located under /usr/local/cross/android-4.3/device/ti/panda/
panda
|
device/ti/panda/kernel
|
kernel/omap
|
panda_defconfig
|
Patch vendor specific
files. Graphic drivers
Download driver
from https://developers.google.com/android/nexus/drivers
You can find it with
searching "Pandaboard" in the page. Pick the latest patch usually at
the bottom
cd
/usr/local/cross/android-4.3
$ tar -xzvf
imgtec-panda-20130603-539d1ac3.tgz
$ ./extract-imgtec-panda.sh
Board Setup
Power supply
Mini-USB to the PC
USB keyboard and mouse
(optional) Ethernet,
on a network that supports DHCP
HDMI-to-DVI-D on the
P1 DVI-D connector
# Initial setup, part
1: build fastboot
make fastboot
Install:
out/host/linux-x86/bin/fastboot
/usr/local/cross/android-4.3out/host/linux-x86/bin/fastboot
Building the Kernel
Follow the AOSP kernel
build instruction to download Android kernel source code for pandaboard at http://source.android.com/source/building-kernels.html
$ANDROID_BUILD_TOP is an export variable pointing to
/usr/local/cross/android-4.3
$ mv
/usr/local/cross/android-4.3/device/ti/panda /usr/local/cross/android-4.3/device/ti/panda.old
$ cd /usr/local/cross/android-4.3/device/ti
$ git clone https://android.googlesource.com/device/ti/panda
$ cd panda
$ git log --max-count=1 kernel
commit 224d695ed9e09c32479b63412eb345e78c2b4349
Author: Jean-Baptiste Queru
Date: Mon Dec 3 18:57:54 2012 -0800
New PandaBoard kernel
Built from kernel cb5fc502c60be9305c5a007be335e860d9e7c0cb
cb5fc50 Revert "I2C: OMAP: correct SYSC
register offset for OMAP4"
623520a ARM:Panda: Add TI ST HCI flag
582ab23 Bluetooth: Add tty HCI driver
Change-Id: Ib3d6b2c809f0f88586455c4056f92511a845c70b
The
commit message for the kernel binary contains a partial git log of the kernel
sources that were used to build the binary in question. The first entry commit 224d695ed9e09c32479b63412eb345e78c2b4349 in the log is the most
recent, i.e. the one used to build that kernel. You will need it at a later
step unless you want to use a different kernel
Identifying kernel
version
To determine the kernel version used in a particular system
image, run the following command against the kernel file by creating a small
kernel_version.sh file with the following command:
cd
/usr/local/cross/android-4.3/device/ti/panda/
$ dd if=kernel bs=1 skip=$(LC_ALL=C grep -a -b -o $'\x1f\x8b\x08\x00\x00\x00\x00\x00'
android@U64:/usr/local/cross/android-4.3/device/ti/panda$
./kernel_version.sh
Linux version 3.0.31-gcb5fc50 (jbq@jqueru.mtv.corp.google.com)
(gcc version 4.6.x-google 20120106 (prerelease) (GCC) ) #1 SMP PREEMPT Mon Dec
3 18:52:22 PST 2012
3676700+0 records in
3676700+0 records out
3676700 bytes (3.7 MB) copied, 12.4303 s, 296 kB/s
android@U64:/usr/local/cross/android-4.3/device/ti/panda$
Downloading
sources
Depending on which
kernel you want,
$ git clone https://android.googlesource.com/kernel/omap.git
this will create sub
folder /usr/local/cross/android-4.3/device/ti/panda/omap but the folder will appear empty. This is
expected
Downloading a prebuilt
gcc
Ensure that the
prebuilt toolchain is in your path.
$ export PATH=$(pwd)/prebuilts/gcc/linux-x86/arm/arm-eabi-4.6/bin:$PATH
or
On a linux host, if
you don't have an Android source tree, you can download the prebuilt toolchain
from:
$ cd /usr/local/cross
$ mkdir androidtoolchain
$ cd androidtoolchain
$ git clone https://android.googlesource.com/platform/prebuilts/gcc/linux-x86/arm/arm-eabi-4
In my case I decided to
get the toolchain under under /usr/local/cross/androidtoolchain/ for the
purpose of building the panda kernel
Building
As an example, we
would build the panda kernel using the following commands:
$ export ARCH=arm
$ export SUBARCH=arm
$ export CROSS_COMPILE=arm-eabi-
$ cd omap
$ git checkout cb5fc502c60be9305c5a007be335e860d9e7c0cb
if you were using sudo to execute repo make sure you change the
permission of all files
recursively because the environment variable for the toolchain
rely on the local user not super user
chown -R android:android *
or use a different experimental
kernel branch at your own risk :)
android@U64:/usr/local/cross/android-4.3/device/ti/panda/omap$
git branch -r
origin/HEAD -> origin/master
origin/android-omap-3.0
origin/android-omap-panda-3.0
origin/android-omap-steelhead-3.0-ics-aah
origin/android-omap-tuna-3.0
origin/android-omap-tuna-3.0-ics-mr1
origin/android-omap-tuna-3.0-jb-mr0
origin/android-omap-tuna-3.0-jb-mr1
origin/android-omap-tuna-3.0-jb-mr1.1
origin/android-omap-tuna-3.0-jb-mr2
origin/android-omap-tuna-3.0-jb-pre1
origin/android-omap-tuna-3.0-mr0
origin/android-omap-tuna-3.0-mr0.1
origin/glass-omap-xrr02
origin/glass-omap-xrr35
origin/glass-omap-xrr64b
origin/glass-omap-xrr88
origin/glass-omap-xrs36
origin/glass-omap-xrs68
origin/glass-omap-xrs92
origin/glass-omap-xrt35
origin/linux-omap-3.0
origin/master
origin/sph-l700-fh05
android@U64:/usr/local/cross/android-4.3/device/ti/panda/omap$
android@U64:/usr/local/cross/android-4.3/device/ti/panda/omap$git
checkout
remotes/origin/android-omap-panda-3.0
Edit before building
Add CONFIG_USB_SERIAL_CP210X=y at the end
of :/usr/local/cross/android-4.3/device/ti/panda/omap/arch/arm/configs/panda_defconfig
android@U64:/usr/local/cross/android-4.3/device/ti/panda/omap$vi
arch/arm/configs/panda_defconfig
CONFIG_USB_SERIAL_CP210X=y
Increase system image partition size
/usr/local/cross/android-4.3/device/ti/panda/BoardConfig.mk
BOARD_SYSTEMIMAGE_PARTITION_SIZE
:= 300000000
#BOARD_SYSTEMIMAGE_PARTITION_SIZE
:= 268435456
|
$ cd /usr/local/cross/android-4.3/device/ti/panda/omap/
$ make panda_defconfig
$ make
The kernel binary is
output as: `arch/arm/boot/zImage` It can be copied into the Android source tree
in order to build the matching boot image.
Or you can include
the TARGET_PREBUILT_KERNEL variable while using make bootimage or any other make command line that
builds a boot image.
$ export TARGET_PREBUILT_KERNEL=/usr/local/cross/android-4.3/device/ti/panda/omap/arch/arm/boot/zImage
That variable is
supported by all devices as it is set up via
device/common/populate-new-device.sh
Add adb TCP Capability
Add the following
line setprop service.adb.tcp.port
5555 to /usr/local/cross/android-4.3/device/ti/panda/init.omap4pandaboard.usb.rc
just after on
property:sys.usb.config=adb
on property:sys.usb.config=adb
setprop service.adb.tcp.port 5555
write /sys/class/android_usb/android0/enable 0
write /sys/class/android_usb/android0/idVendor
0451
write /sys/class/android_usb/android0/idProduct
D101
write /sys/class/android_usb/android0/functions
${sys.usb.config}
write /sys/class/android_usb/android0/enable 1
setprop sys.usb.state ${sys.usb.config}
Edit init.rc if you want
to start some services you wrote :) or give permission to specific folders or
binary on the device
/usr/local/cross/android-4.3/device/ti/panda/init.omap4pandaboard.rc
Not a bad idea to patch
any framework specific files
Start the build
use usbboot to push the
boot loader
USB downloader and USB
second stage bootloader for OMAP44xx
===========================================================
aboot.bin
---------
aboot.bin is a designed
to be a second stage USB bootloader (what TI calls x-loader) for the USB
peripheral boot mode of OMAP44xx. Currently it's somewhat pandaboard-centric,
but that should be
easy enough to clean up
-- it shouldn't touch any gpiomux config except (maybe) for the UART.
All it does is send a
u32 message (0xaabbccdd) back over the USB link, then reads a u32 size from the
host. Then it downloads size bytes from the host to 0x82000000 and jumps
to that address.
usbboot
-------
usage: usbboot
<2ndstage> [  ]
]
- usbboot will poll every 250ms until it locates an OMAP device
(VID 0451, PID d00f)
- it then will send the 2ndstage binary to the device
- if an image was also provided, it will wait for the 2ndstage to
send the go-ahead response (0xaabbccdd) and then send that image
- usbboot will poll every 250ms until it locates an OMAP device
(VID 0451, PID d00f)
- it then will send the 2ndstage binary to the device
- if an image was also provided, it will wait for the 2ndstage to
send the go-ahead response (0xaabbccdd) and then send that image
Fastboot USB driver for
Panda
and create /etc/udev/rules.d/51-android.rules file replace owner with the current user (build
user) in my case android
sudo chmod 644 /etc/udev/rules.d/51-android.rules
cd /usr/local/cross/android-4.3
# Initial setup, part 2:
# With no SD card inserted, plug USB first, then the power cord,
# and load fastboot over USB:
device/ti/panda/usbboot device/ti/panda/bootloader.bin
#if you have issue connecting to the device run usbboot using sudo :)
# Initial setup, part 3:
fastboot
fastboot is the
command line utility that flashes Android to a device. As mentioned earlier,
the Linux build offastboot from source under out/host/linux-x86/bin
under /usr/local/cross/android-4.3. Android SDK /usr/local/cross/android-4.3_r2.1/out/host/linux-x86/bin/fastboot for Windows ships with fastboot under platform-tools folder.
You can continue the rest of the fastboot procedure using the Windows
binary, instead of using the one built by the AOSP build.
You’ll need to copy
all image files built by make under out/target/product/panda to
the Windows host and run the following commands from the Windows command
prompt. Change ANDROID_SDK_PATH appropriately.
Windows:
set ANDROID_SDK_PATH=C:\Users\user\AppData\Local\Android\android-sdk
%ANDROID_SDK_PATH%\platform-tools\fastboot.exe
oem format
%ANDROID_SDK_PATH%\platform-tools\fastboot.exe flash xloader xloader.bin
%ANDROID_SDK_PATH%\platform-tools\fastboot.exe flash xloader xloader.bin
%ANDROID_SDK_PATH%\platform-tools\fastboot.exe flash bootloader bootloader.bin
# Once in fastboot, insert and initialize an SD card (4GB or greater):
#if you want to have a different partition for the /sdcard inside the image on the SDCARD :) please follow step 7 of Repartition Sdcard section
Modify $ANDROID_BUILD_TOP/device/ti/panda/fstab.omap4pandaboard to mount partition 8 at boot time.
/usr/local/cross/android-4.3/out/host/linux-x86/bin/fastboot oem format
root@Latitude-E4310:/usr/local/cross/android-4.3_r2.1$ out/host/linux-x86/bin/fastboot oem format
...
OKAY [ 0.389s]
finished. total time: 0.406s
root@Latitude-E4310:/usr/local/cross/android-4.3_r2.1$ out/host/linux-x86/bin/fastboot oem format
...
OKAY [ 0.389s]
finished. total time: 0.406s
/usr/local/cross/android-4.3/out/host/linux-x86/bin/fastboot flash xloader device/ti/panda/xloader.bin
root@Latitude-E4310:/usr/local/cross/android-4.3_r2.1$ out/host/linux-x86/bin/fastboot flash xloader device/ti/panda/xloader.bin
sending 'xloader' (23 KB)...
OKAY [ 0.006s]
writing 'xloader'...
OKAY [ 0.239s]
finished. total time: 0.245s
root@Latitude-E4310:/usr/local/cross/android-4.3_r2.1$ out/host/linux-x86/bin/fastboot flash xloader device/ti/panda/xloader.bin
sending 'xloader' (23 KB)...
OKAY [ 0.006s]
writing 'xloader'...
OKAY [ 0.239s]
finished. total time: 0.245s
/usr/local/cross/android-4.3/out/host/linux-x86/bin/fastboot flash bootloader device/ti/panda/bootloader.bin
root@Latitude-E4310:/usr/local/cross/android-4.3_r2.1$ out/host/linux-x86/bin/fastboot flash bootloader device/ti/panda/bootloader.bin
sending 'bootloader' (161 KB)...
OKAY [ 0.017s]
writing 'bootloader'...
OKAY [ 0.295s]
finished. total time: 0.312s
root@Latitude-E4310:/usr/local/cross/android-4.3_r2.1$ out/host/linux-x86/bin/fastboot flash bootloader device/ti/panda/bootloader.bin
sending 'bootloader' (161 KB)...
OKAY [ 0.017s]
writing 'bootloader'...
OKAY [ 0.295s]
finished. total time: 0.312s
# Build and flash, part 1: Do a build
source build/envsetup.sh
#remove backup or movide it to ~ just in case you want to revert to default :)
rm -rf /usr/local/cross/android-4.3/device/ti/panda.old
or
mv /usr/local/cross/android-4.3/device/ti/panda.old ~/panda/
lunch full_panda-userdebug
time make -j4
# Build and flash, part 2: Flash
# Reboot into the SD card's fastboot (hold GPIO_121 and press PWRON_RESET)
# and flash the system or use usbboot to boot into fastbootmode
fastboot erase cache
root@Latitude-E4310:/usr/local/cross/android-4.3_r2.1/out/target/product/panda$ /usr/local/cross/android-4.3_r2.1/out/host/linux-x86/bin/fastboot erase cache
erasing 'cache'...
OKAY [102.415s]
finished. total time: 102.415s
root@Latitude-E4310:/usr/local/cross/android-4.3_r2.1/out/target/product/panda$ /usr/local/cross/android-4.3_r2.1/out/host/linux-x86/bin/fastboot erase cache
erasing 'cache'...
OKAY [102.415s]
finished. total time: 102.415s
fastboot flash userdata
root@Latitude-E4310:/usr/local/cross/android-4.3_r2.1/out/target/product/panda$ /usr/local/cross/android-4.3_r2.1/out/host/linux-x86/bin/fastboot flash userdata
sending 'userdata' (10432 KB)...
OKAY [ 0.632s]
writing 'userdata'...
OKAY [ 4.563s]
finished. total time: 5.196s
root@Latitude-E4310:/usr/local/cross/android-4.3_r2.1/out/target/product/panda$ /usr/local/cross/android-4.3_r2.1/out/host/linux-x86/bin/fastboot flash userdata
sending 'userdata' (10432 KB)...
OKAY [ 0.632s]
writing 'userdata'...
OKAY [ 4.563s]
finished. total time: 5.196s
fastboot flashall
root@Latitude-E4310:/usr/local/cross/android-4.3_r2.1/out/target/product/panda$ /usr/local/cross/android-4.3_r2.1/out/host/linux-x86/bin/fastboot flashall
--------------------------------------------
Bootloader Version...: U-Boot 1.1.4-gedeced79
Baseband Version.....:
Serial Number........: 52FC000200000001
--------------------------------------------
checking product...
OKAY [ 0.001s]
sending 'boot' (3846 KB)...
OKAY [ 0.235s]
writing 'boot'...
OKAY [ 2.303s]
sending 'recovery' (4384 KB)...
OKAY [ 0.267s]
writing 'recovery'...
OKAY [ 2.844s]
sending 'system' (186367 KB)...
OKAY [ 11.277s]
writing 'system'...
OKAY [ 69.094s]
rebooting...
finished. total time: 86.030s
Windows:
%ANDROID_SDK_PATH%\platform-tools\fastboot.exe
erase cache
%ANDROID_SDK_PATH%\platform-tools\fastboot.exe
-p panda flash userdata userdata.img
%ANDROID_SDK_PATH%\platform-tools\fastboot.exe
-p panda flash boot boot.img
%ANDROID_SDK_PATH%\platform-tools\fastboot.exe
-p panda flash system system.img
%ANDROID_SDK_PATH%\platform-tools\fastboot.exe
-p panda flash recovery recovery.img
%ANDROID_SDK_PATH%\platform-tools\fastboot.exe -p panda flash cache cache.img
The flashall option
of fastboot fails as follows, hence the need to flash image files
individually.
%ANDROID_SDK_PATH%\platform-tools\fastboot.exe
-p panda flashall
error: could not load
android-info.txt: No error
At this point you can reset the PandaBoard so
that it loads Android!
To boot into fastboot
mode ever again, hold the GPIO_121 button (furthest button from sd card) and
press and release the PWRON_RESET button. Release the GPIO_121 button after a
while.
# Post-boot setup, part 1: Set the date on the board:
adb shell date $(date +%s)
# Post-boot setup, part 2: (optional) Configure Ethernet
adb shell dhcpcd eth0
ADB over USB
Android Gadget ADB: Linux PC Host
Sequence:
1. Boot the Android kernel with g_android built
in and 'Android gadget adb' function selected
2. Connect one end of the cable to the MUSB port
on the target and the other to the Linux HOST machine;
3. On the left hand top corner of the Android UI
screen you should see a ‘USB Attached’ Notification.
4. Make sure on the target 'USB Debugging' is
selected:
-On Android UI,
-Press F1 key,
-Goto Notifications
-Select USB debugging
5. To make ADB work for TI vendor ID, On your
Host machine create the following file (if not already present):
$ sudo su
$ mkdir ~/.android
$ vi ~/.android/adb_usb.ini
$ echo "0x0451" > ~/.android/adb_usb.ini
$ cat /root/.android/adb_usb.ini
0x0451
6. Mount the 'usbfs' filesystem on the Linux
Host Machine (Note: optional step, ignore if usbfs is not present in Ubuntu
10.10)
$ sudo mount -t usbfs none /proc/bus/usb
7. Also, on the Host make sure adb server is
running:
$ sudo su
$ cd /mydroid/out/host/linux-x86/bin
$ ./adb kill-server
$ ./adb start-server
8. Verify that the gadget enumerated properly on
the host (Linux PC) by running: (Note: optional step, ignore if usbfs is not
present in Ubuntu 10.10)
$ cat /proc/bus/usb/devices
| grep “usbfs”
9. Now check that the device is connected:
$ cd /mydroid/out/host/linux-x86/bin
$ ./adb devices
[output should be something like this] List of
devices attached [serial number] device
$ ./adb shell
[This should take you to the console prompt of
the board] to quit, type exit. 10. Write a file in to the FS on board:
$ ./adb push /file ./
[This will transfer 'file' in to the / of the FS
on the board, check using 'ls' on the console prompt of the board] 11. Read a
file from the FS on board into the Host machine
$ ./adb pull ./file /dir/
[This will copy 'file' from the FS into the Host
machine]
NOTE: You can use locally built version that should just work on your boxes without the extra configurations.
ADB Binary is here
NOTE: These instructions assume that you will always be running ADB operations in super user mode. To run ADB over USB as your normal user, create/edit adb_usb.ini in your home directory instead i.e step 5 would look this:
$ mkdir -p ~/.android
$ echo "0x0451" > ~/.android/adb_usb.ini
$ cat ~/.android/adb_usb.ini
0x0451
However, you will have to start adb in sudo
mode.
$ sudo /mydroid/out/host/linux-x86/bin/adb kill-server
$ sudo /mydroid/out/host/linux-x86/bin/adb devices
* daemon not running. starting it now *
* daemon started successfully *
List of devices attached
686A00011FF00000
device
Android Gadget ADB: Windows PC Host
Sequence:
1. On windows Host, Download latest Android SDK
(http://developer.android.com/sdk/index.html),
the installer version is recommended.
2. At the end of the installation select the
option "Start SDK Manager".
3. If you are behind a firewall you'll need to
go to Tools -> Options of the SDK Manager to enter your proxy info. Go to
Packages -> Reload if you enter proxy info.
4. At a minimum install the following packages:
§ Tools -> Android SDK Platform-tools
§ Extras -> Google USB Driver
Note: If "Google USB Driver" doesn't show up initially
then install the platform-tools, close SDK Manager, and open SDK-manager.
5. Optionally, you may want to add the location
of the SDK's primary tools directory to your system PATH. Right-click on My
Computer, and select Properties. Under the Advanced tab, hit the Environment
Variables button, and in the dialog that comes up, double-click on Path (under
System Variables). Add the full path to the tools\ directory to the path.
6. Create a file "%USERPROFILE%\.android\adb_usb.ini":
> echo 0x0451 >
"%USERPROFILE%\.android\adb_usb.ini"
> type "%USERPROFILE%\.android\adb_usb.ini"
0x0451
7. Edit android_winusb.inf (found in C:\Program
Files\Android\android-sdk\extras\google\usb_driver on a Windows XP installation)
to match TI vendor ID and USB Gadgets product ID's:
§ Under [Google.NTx86] section if
you are running 32bits Windows edition, or under [Google.NTamd64]
section for 64bits Windows, add these lines and save the file:
; OMAP-3/4
%SingleAdbInterface% = USB_Install, USB\VID_0451&PID_D101
%CompositeAdbInterface% = USB_Install,
USB\VID_0451&PID_D102&MI_01
%CompositeAdbInterface% = USB_Install,
USB\VID_0451&PID_D106&MI_02
%CompositeAdbInterface% = USB_Install,
USB\VID_0451&PID_D107&MI_03
%SingleAdbInterface% = USB_Install, USB\VID_0451&PID_FFFFE
%CompositeAdbInterface% = USB_Install,
USB\VID_0451&PID_FFFE&MI_01
%SingleAdbInterface% = USB_Install, USB\VID_0451&PID_D022
%CompositeAdbInterface% = USB_Install,
USB\VID_0451&PID_D022&MI_01
%CompositeAdbInterface% = USB_Install,
USB\VID_0451&PID_D10A&MI_01
; OMAP-3 / 4 - ICS
%CompositeAdbInterface% = USB_Install,
USB\VID_0451&PID_D109&MI_01
8. Boot the Android kernel with g_android built in and 'Android gadget adb' function selected
9. Connect micro-B USB cable between Blaze board
and Windows PC.
10. Windows should pop up a driver installation
dialog
§ Choose "install from a specific
location"
12. Open command prompt and restart adb server
just to make sure it is in a proper state:
$ adb kill-server
$ adb start-server
$ adb devices
[output should be something like this]
13. Write a file in to the FS on board:
$ adb push /file ./
[This will transfer 'file' in to the / of the FS
on the board, check using 'ls' on the console prompt of the board]
14. Read a file from the FS on board into the
Host machine
$ adb pull ./file /dir/
[This will copy 'file' from the FS into the Host
machine]
Repartition SDCARD
There are 7 partitions on sdcard after
installing Android 4.3 to Pandaboard. The 7th partition is
"userdata". Once system is up and running, the userdata partition is
mounted at /data. However, it only shows as 512MB instead of 6.232GB - the
actual partition size. In order to use the remaining sdcard storage and avoid
crashing Android by filling up /data partition. We need to repartition sdcard
to create one more partition to use as a sdcard.
The following is the steps to repartition
sdcard.
1.
insert sdcard to a PC
running Linux (make sure GNU "parted" is installed)
2.
find out the sdcard
device by using dmesg; this case /dev/sdc is the sdcard:
a.
[15190300.217921] sd
6:0:0:0: [sdc] 15564800 512-byte logical blocks: (7.96 GB/7.42 GiB)
[15190300.219513] sd 6:0:0:0: [sdc] No Caching
mode page present
[15190300.219518] sd 6:0:0:0: [sdc] Assuming
drive cache: write through
[15190300.222131] sd 6:0:0:0: [sdc] No Caching
mode page present
[15190300.222136] sd 6:0:0:0: [sdc] Assuming
drive cache: write through
[15190300.234635] sdc: sdc1 sdc2 sdc3 sdc4
sdc5 sdc6 sdc7 sdc8
3.
become root and run
the following commands to repartition sdcard; make sure you replace /dev/sdc
with the actual device:
a.
parted /dev/sdc
rm 7
b.
parted /dev/sdc print
make sure you note the beginning of the last
End segment to begin the Start segment for your next(s) partition(s) and that
you use the size for the new partition equal to
Disk /dev/sdc: 7969MB (for a 8 GB SDCARD) -
Start value of partition 7 which is end of partition 6
c.
parted /dev/sdc mkpart userdata ext4 823 1335
parted /dev/sdc mkpart sdcard ext4 1335 7146
parted /dev/sdc print
mkfs -t ext4 /dev/sdc7
mkfs -t ext4 /dev/sdc8
4.
remove the sdcard and
insert it into Pandaboard
5.
boot Pandaboard - it may
take sometime to initialize the system since we wipe out /data
6.
The new partition is
mounted at /storage/sdcard0
7.
You have modified
$ANDROID_BUILD_TOP/device/ti/panda/fstab.omap4pandaboard to mount
partition 8 at boot time.
14a15
> /dev/block/platform/omap/omap_hsmmc.0/by-name/sdcard
/storage/sdcard0 ext4 defaults defaults
Note: the
"parted" command may complain about GPT corruption; ignore it and
enter "OK" to continue. If asked for partition number, enter
"7" for partition 7 (we remove partition 7).
Unpacking and repacking boot.img when changing init.rc
The Android root filesystem is not modifiable
from adb because it is recreated from boot.img everytime system is restarted.
To modify init.rc, the boot.img must be unpacked to extract files and
directories and then repacked to be flashed to device.
Pandaboard sdcard is divided into 7 or 8 (See
Repartition sdcard) partitions. The boot.img is is the 4th partition. If
/dev/sdc is the sdcard, /dev/sdc4 is the boot partition. Issue the following
command to retrieve boot.img from /dev/sdc4:
dd if=/dev/sdc4 bs=16k of=boot.img
The following perlscript can
be used to unpack and repack boot.img.
To unpack, issue the following command:
unpack-bootimg.pl boot.img
This will create several files and directory:
-rw-r--r--. 1 root root 8388608 Nov 19 14:50
boot.img
-rw-r--r--. 1 root root 5115904 Nov 19 14:50
boot.img-kernel.gz
drwxr-xr-x. 8 root root 4096 Nov 19 14:52
boot.img-ramdisk
-rw-r--r--. 1 root root 3270656 Nov 19 14:50
boot.img-ramdisk.cpio.gz
The init.rc files are in boot.img-ramdisk
directory.
To repack, issue the following command:
repack-bootimg.pl boot.img-kernel.gz
boot.img-ramdisk boot2.img
The boot2.img is the newly created boot.img and
can be flashed to device.
dd if=boot2.img bs=16k of=/dev/sdc4
Note:
1. dd command can also be used to make a copy of
sdcard to local filesystem; the following command creates a device image of the
same size as the SD card(e.g. 8GB):
dd if=/dev/sdc bs=16k of=pandaboard_device_android-4.3.img
2. WLAN group uses Linaro Android distribution,
which specifies custom kernel address at 0x80000000. The repack perl script
should be modified to add "--base 0x80000000" to mkbootimg argument.
Otherwise, pandaboard will enter infinite loop in loading kernel.


