Introduction
This blog article demonstrates how any users using Adobe Creative Suite CS4 or Adobe Flash CS4 Professional can create Interactive H264 Video for Flash player 10 to be viewed by any web browser supporting Flash Player 10 or higher. The following Software (part of Adobe Creative Suite CS4 or bundled with Adobe Flash CS4) as well as a third party Software called Activideo http://shop.actimus.com/ will be used in sequential order.
http://www.adobe.com/technology/graphics/video_visualization_and_interaction.html
1) Adobe Media Encoder CS4 or Adobe Media Encoder CS5
2) Adobe Bridge CS4 or Adobe Media Encoder CS5
3) Third party products such as Activideo (used in this article) or Adobe After Effect CS4 (http://vimeo.com/2345579) and finally
4) Adobe Flash CS4 or even Better Adobe Flash CS5 which support live preview of video on the designer stage
Users don't have to be familiar with Adobe Media Encoder to generate the XMP data but must be familiar with Action Script 3.0 to create the interactive experience inside Flash CS4 or Flash CS5. They can incorporate XMPData Event exposed by the NetStream player class. You must be familiar with mouse click event in Action Script 3 and really fast mouse hit test detection and finally you must be able to execute additionnal Action Script 3 functions.
Interactive user mouse click over specific areas in the video can provide useful web analytic data for the content provider streaming the videos, or lead the user to third party web site, or be able to jump to another position in the same video or a relative FLV or F4V video...
On android OS 2.2 with Flash Player 10.1 user could pause the video and display a popup to jump to various web site.
The time to produce an interactive video can vary from 5 minutes to few hours depending on variable parameters which have more or less impact on the time to complete the interactive presentation.
This time didn't include the encoding time of the H264 Video.
Software with motion tracking engine such as Adobe After Effects will also
facilitate the production of your interactive hot spots.
We are going to focus on one use cases. The first use case will show you step by step how to turn a logo within a Music Video Clip into a functional HyperLink to lead the user to the Television Company Web Site or a landing web page focused on the artist within the Television Company Web Site.
Why Interactive Video
1.Produce interactive banner ads using Flash and H264 F4V Video with persisted link in the Video so that syndicators can target ads for higher returns.
2. Same content used on TV and on the web and now on devices running Android 2.2 OS
3. Produce music or video clip which can lead the user to the content owner or artist web site so that they can earn more revenue.
4. Be able to increase search accuracy of H264 video content for search engine based on URL attached to specific object in time.
5. Provide “hidden” web analytic feedback to company to help them know which object were clicked in the Video by a user when and how many times.
6. Lead the user to other video or segment of the same video when the same object appears.
Music Video Clip Use Case
Step 1 Launch Adobe Media Encoder CS4 - Select Video Source and add to Batch
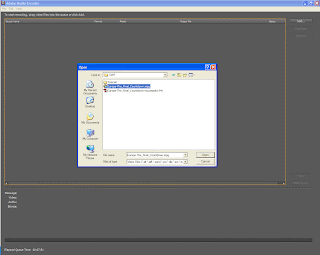
Step 2 Adobe Media Encoder CS4 - Insert Event Cuepoint for Interactive Sequence SMPTE Time In,
This step is no longer require with the updated version of Activideo. Activideo will generate an XMP file which can be embedded immediately in the Video (no need to merge)
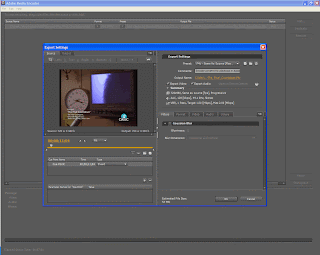
The first step consist of using Adobe Media Encoder CS4 to encode your Video Source into H264 video and provide a list of marker matching each video segment related to each interactive sequences you are willing to produce. In our sample we will only create one sequence so for this manner you just have to provide two event markers.
We pick an mpeg one video clip of an 80's band Europe for there hit The Final Countdown. The reason we are doing this step is to produce a video with embedded XMP track. You can avoid this step if you are using latest version of Activideo (July 2010) but this is better to merge the XMP metadata exported by Activideo with additional Cue Points parameters with the XMP Metadata produced by Adobe Media Encoder.
When you add the source video file to Adobe Media Encoder CS4 batch list you can double click on the preset to be able to open the export settings window panel. From there you can provide in and out cuepoint. You can use the slider to be able to visually detect the beginning of your sequence. In this particular case when the VH1 classic logo appears.
For convenience give each in and out CuePoint a name which will help you associate each interactive sequence during the merging operation. The reason for doing this is that when Adobe Media Encoder will encode the video some XMP Metadata will be inserted in the Video Clip.
Adobe broaden XMP as the standard for embedded metadata to be used for internal and external workflow. In our use case XMP metadata will be used for external usage.
What is XMP ?
1. XMP is based on XML hence grammar can be extended at anytime
2. XMP is used across all Adobe Product for a better workflow
3. XMP can help users to work and collaborate on the same project thanks to the merging capability of XMP Data.
4. Using XMP provide indexation features for triple store engine once XMP data is converted to RDF hence web crawler can perform indexation of any files tagged using Adobe tools or thanks to the public version of XMPCore SDK
5. XMP is embedded in the Video File and remains in the video even if the content is moved or copy from one server to an other.
6. Video and its private data can be delivered in a single connection from Flas Media Server using RTMP protocol as well as from any HTTP server used to provide progressive download and playback mechanism to Flash Player.
7. XMP can be parsed using for x loop in Action Script 3
Step 3 Adobe Media Encoder CS4 - Insert Event Cuepoint for Interactive Sequence SMPTE Time Out
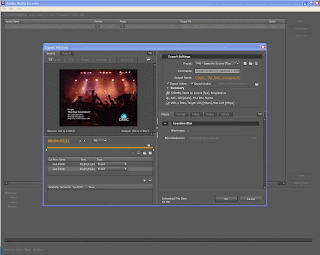
Using the video slider, look for the specific time where the logo will disappear and create an other Event Cuepoint. Once you have set both in and out Cuepoint to define the interval for your interactive sequence, you can Encode the video. To proceed to the next step you will have to wait for the F4V (H264 Video) to be fully encoded. The encoding time will vary based on your CPU speed. It is highly recommended to do
H264 encoding on Multi Core Computer or really fast single core CPU. It is also highly recommended to encode using Adobe Media Encoder for a valid interactive video use case. Doing that will ensure that correct XMP data will be embedded in the Video and this will also reserve some space in the beginning of the video to be able later on to merge Interactive XMP data with XMP Data previously embedded in the Video.
Step 4 Adobe Media Encoder CS4 - Encode F4V H264 Video for Flash Player 10
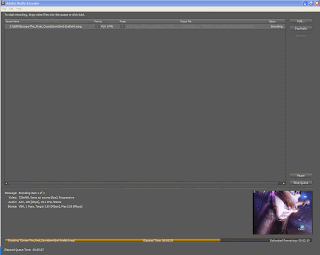
Encoding Process. All encoding and scrubbing for In and Out time code tasks to reserve Cuepoint entries for Video footage can be done by one person while an other person will generate the Interactive Data aimed to be merge at the end of encoding workflow.
Produce Interactive Sequence for a static area using Activideo
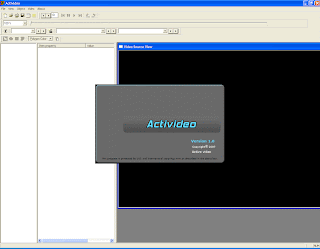
When it comes to generate fast interactive sequences for static area I really like to use Activideo. But don't get me wrong here, Interactive Sequence don't have to be static. Activideo is a software created by a small company Actimus which can help you generate all what you need to produce the raw data needed for an interactive video experience. For more information about Activideo visit http://shop.actimus.com/ and to see how it work visit http://shop.actimus.com/demo/howitworks/. Some video tutorials are also available to explain you how to use Activideo
http://shop.actimus.com/demo/tutorials/
Activideo is a fast and easy way to turn your videos into interactive presentations thanks to the export of well known Adobe XMP Metadata container. Activideo adds interactive hot spots (also called overlay sequences) to your videos. It is a simple but powerful concept: user-created hyperlinks within the video at various intervals and for specific areas in the video the same way hypertext is used on the Internet. These hyperlinks and interactive hotspots are exported into Adobe XMP RDF XML file format. Activideo could also produce Adobe Flash CS4 Action script 3 file along with a FLA and HTML template to be able to build your custom SWF with Adobe Flash CS4 thanks to a Plugin SDK.
Input Formats:
Activideo supports many input video file formats mostly any file format supported by the Direct Show software stack. Today, it currently supports MPEG1, MPEG2*, MPEG2-TS* transport streams including HD (720, 1080), DivX*, Microsoft AVI, Microsoft WMV* and WMV-HD * and Blueray * m2ts file. Activideo never modifies the original source video neither encode a Video. This tasks is left to Adobe Media Encoder and Adobe Bridge CS4 bundled with Adobe Flash CS4 Pro
Overlays:
The outlining of the overlay sequences is very precise because Activideo supports polygons with up to 100 vertices within a sequence. It performs linear interpolation of each vertex to transition smoothly from one shape to another. While the video is playing into Activideo, the user can move the current polygon location with the mouse visually to match any portion of the video associated and covered by polygon (and polygon are not visible on top of the final encoded Video. This is a human intervention process but it can be automated if the user doesn't plan to move the object on screen thanks to a very functional Wizard well suited to create a unique sequence and for example turn a logo encoded in the video into an hyperlink. To ease the overlay authoring process, a static logo sequence can be generate using the Creation Wizard.
Applications:
With Activideo, users can add interactive hotspot to their videos. Since the XMP data can be embedded into the Video using Adobe Media Encoder CS4/CS5 or Adobe Bridge CS4/CS4 the hyperlink will always moved whenever the Video is duplicated acting as a watermark for your video. It also provides a way to publish interactive Ads Banner using FLV or H264 video. Activideo will not encode video but just export XMP file using Adobe Flash CS4 FLV Cuepoint RDF grammar. The generated XMP metadata can be merged and embedded into FLV or F4V Video using Adobe Media Encoder or Adobe Bridge CS4. FLV or H264 Video can be encoded using Adobe Media Encoder or Elecard converter studio.
Demo version:
Yes : Export of XMP
No : Project saving.
Yes : Wizard to create an interactive sequence available.
21 days of evaluation.
It will take you 2 minutes to generate a simple interactive sequence for a static logo but you can create complex sequence to match moving objects in the video.
Full version:
Yes : Export XMP
Yes : Access to self registered COM Export Plug-ins available through Export As Menu
No activation required.
Although this use cases is focused on demonstrating how XMP can be used in H264 video for hyperlinks, Activideo can also provide Manual selection and on screen positioning of shapes on top of the video while the video is playing usefull when object are moving. Activideo support linear interpolation between shapes with the same amount of vertices set by default for all the sequences.
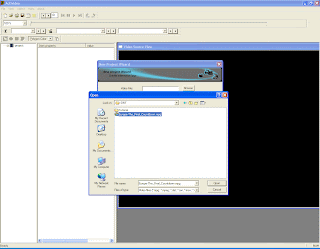
When you launch Activideo you will browse for the same Video Source you used to produce an H264 Video with Adobe Media Encoder CS4. Note that this use case will work only if the Video Size of your Encoded Video is the exact same size than
your Video Source. This is mandatory because we want all the Interactive Sequence coordinate in pixel to match the source and encoded video as well in term of duration and dimension.
Step 5 Activideo - Using the New project Wizard Option from the File Menu
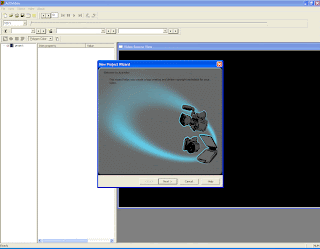
Step 6 Activideo - Browse Video Source
Step 7 Activideo - Provide Basic Metadata
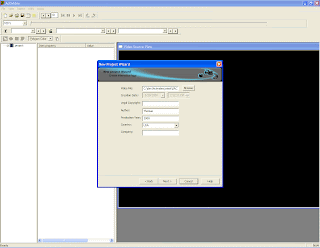
Step 8 Activideo - Interactive Sequence Generator
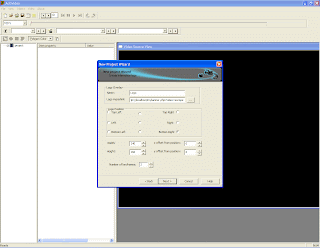
Provide a unique Name for your sequence to easily identify each interactive Sequence in your exported XMP file.
Provide an hyperlink. This can be relative path, absolute link to a fully qualify domain name URL or can be some sort of data which could be executed or interpreted using Action Script 3 code.
Provide a default location for your interactive hotspot. This is where you provide the default initial location of your hotspot. This position don't have to be accurate but this will accelerate the sequence tuning process.
Provide the initial size of your interactive hotspot.
Provide the number of key frame that you want for your interactive sequence. Since your hotspot is not going to move two keyframes are enough but you can insert more key frame if needed. Adding keyframe at this time is not really helpful since you want a keyframe to be set/added whenever the object within the sequence is likely to move in a different direction than the direction between two consecutive keyframes surrounding a specific frame within the sequence.
Step 9 Activideo - Click on Finish to Generate the Sequence
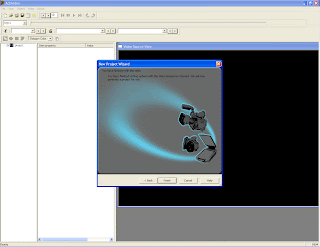
Step 10 Activideo - Adjust the sequence SMPTE In Time Code to Match Adobe Media Encoder SMPTE In Time Code
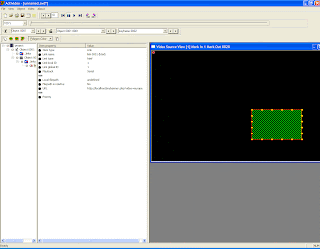
Use the video slider to locate the position where you set the In Event Cuepoint in Adobe Media Encoder. This time didn't have to be exactly perfect but close enough to be able to merge correct 2D spatial information in the XMP Data embedded in the H264 version of the video.Once you found the location you can select the overlay polygon move it right on top of the logo and adjust the size of the polygon using the right click button of your mouse to scale down or up the polygon. Finaly click in the toolbar on the trim before button. This will insert a keyframe and remove all keyframe prior to the current position.
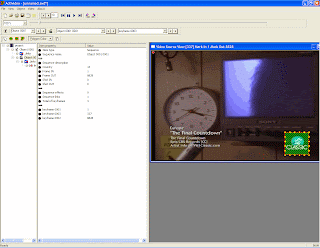
Step 11 Activideo - Adjust the sequence SMPTE Out Time Code to Match Adobe Media Encoder SMPTE Out Time Code
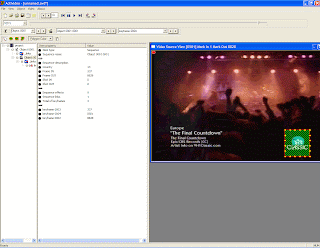
In this frame you noticed an other block of data showing the Name of the Band, the track title and information related to the right owner of the content. A valid use case would be to create hyperlinks sequence for all of the content listed earlier to lead the user to multiple unique URL's.
For this ending sequence position select the trim after button in the toolbar. This will insert a keyframe and delete all following keyframes.
Step 12 Activideo - Export Adobe XMP
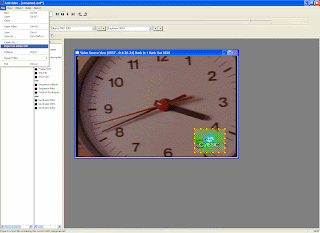
This option let you export the interactive video sequence into an Adobe XMP file
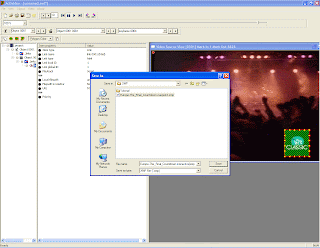
Adobe Bridge CS4 - Exporting and Merging XMP
Step 13 Adobe Bridge CS4 - Exporting XMP From F4V
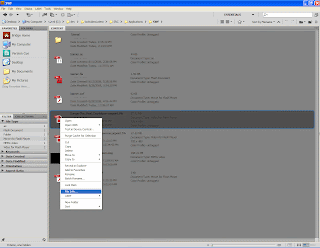
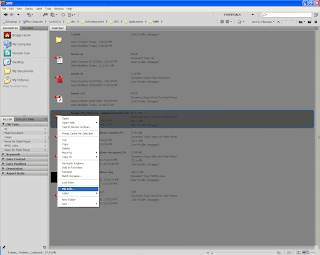
There are several places where you can merge XMP Metadata using software installed with Adobe CS4 professional. The easiest way is to use Adobe Bridge CS4. Once you launch Adobe Bridge CS4 select the folder where you encode the H264 Video and right click on the F4V logo and choose File info...
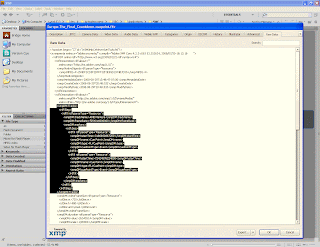
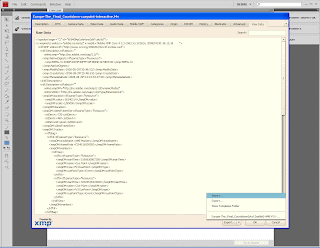
Select the property sheet page named Raw Data. This is where the XMP Block is display in its RAW form. The highlighted text correspond to the AME Track for the unique interactive sequence matching the logo. Export the complete XMP data as a file to disk.
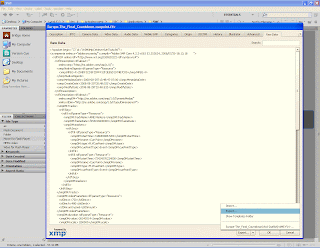
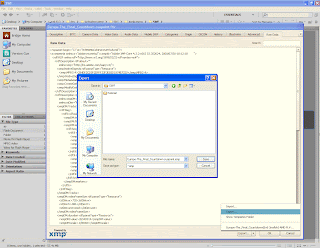
Step 14 Adobe Bridge CS4 - Merging XMP Data between Activideo XMP and the XMP data encoded earlier in the F4V Video.
The best free tool to merge XMP Data that I like to use is called WinMerge. It provides the ability to merge left or right using a double paned window view but notepad can be good enough :) in our example. A commercial version called araxis merge is also really good.
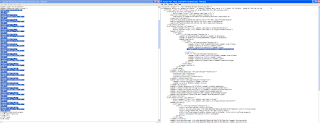
You want to merge the selected bloc in the left notepad window to the right bloc under the selected text in the right notepad loading the previously exported XMP. Don't forget to include the marker as well. Do this for every cuepoints. Once done saved you new XMP file. If you want to compel with XMP you can insert new saving history entry to show in the XMP File that a new software has been used to generate interactive hotspot. This is not a bad idea at all for workflow and tracking purposes.
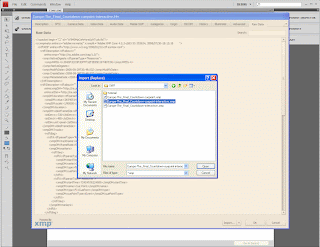
Step 15 Adobe Bridge CS4 - Re-import XMP Data into F4V video file encoded by Adobe Media Encoder CS4
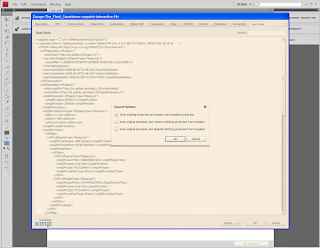
Because we merged manually we can choose the clear existing properties and replace with template properties.
Step 16 Adobe Flash CS4 - Create Interactive FLA Project file and generate SWF
While I understood that Activideo software has a plugin model which should provide solutions to export XMP the way you want I decided to create a FLA project and Action Script 3 code to quickly manipulate the XMP data to do something with the interactive XMP track.
1 Create an Action Script 3 project and saved the project to activideo.fla
2 Create two customs mouse cursor in order to change the mouse cursor when the mouse will be over a hotspot and one cursor when the mouse will be outside
3 Write some code to load XMP data in memory and last but not least
4 Write very fast polygon hit test detection code in Action Script 3 to detect when the mouse is in a Polygon.
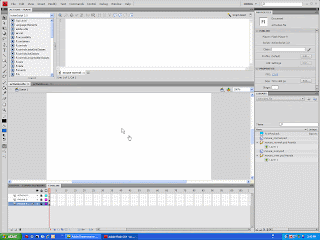
The idea behind the scene would be to write an activideo plugin to generate a FLA which should be attached with a separate Action Script file and a separate XML file. The separate XML file could be used by the action script code to load the video source (local or relative path next to the SWF, http URL or rtmp URL). You can also export various interactive video related parameters specific to the Interactive Video Flash experience you want to deliver to your audience. An interactive video playback control must be self contained and the SWF must be as small as possible.
For ads you should not need any FLVPlayback Component Skins at all.
Actimus LLC is currently working on expanding JW Player and add support to parse XMP data describing Interactive Hotspot. This is a great move since many users want to experience the end result. Since JW player has been embedded in millions of Web Pages this is a great move for Activideo.
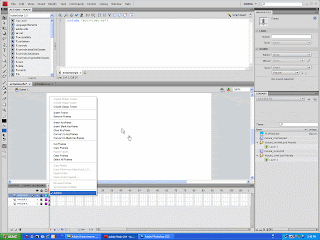
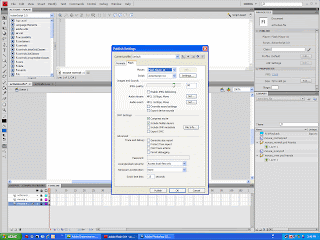
Step 17 Adobe Flash CS4 - Publish Setting
Make sure your publish setting is targeting Flash Player 10 since XMP Data is only available in Flash Player 10. If you target Flash Player 9 flash player 9 won't be able to pre-load the embedded XMP Data but your SWF will still work. This is what i like with Flash. A SWF generated for Player 9 will still be rendered with Flash PLayer 6. You are just going to miss few elements on screen.
Step 18 Adobe Flash CS4 - Publish SWF
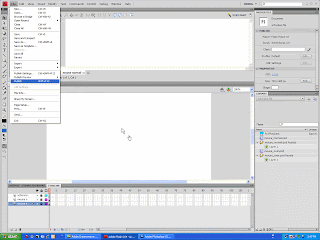
The onXMPData is the Action Script Event Handler which will receive the XMP Raw Data when the Video will be playback. At this point you can build your SWF and test your movie. Make sure that the video is copied next to the FLA and by extension next to the SWF after publishing time unless you provide a custom path in an XML file or in your Action Script Code at runtime. Finally Test your Movie. The custom cursor are build in the FLA project. You can import your own cursor using the Photoshop Importer feature in Flash CS4. You can import transparent PSD and convert each graphic object into a movie clip. When you test the movie, the cursor will show an interactive cursor (hand cursor) when the mouse will be over the interactive hotspot and a standard cursor when the mouse will leave the hotspot. From now on do what you want when clicking in the hotspot !
Good Practice. You can edit the Action Script Code and add some code to auto loop your video (good for ads), you can add some code to turn Audio Off in order not to playback any audio from the Video and decide that you just want to render the video useful for interactive banner.
Actimus is working on a custom FLV and F4V Playback component which will support embedded interactive XMP sequences.
If you are interested in helping writing custom Playback Component send me an email through the following web site http://www.thomasyounsi.com/
Step 19 Adobe Flash CS4 - Test Movie
Outside Interactive Hotspot
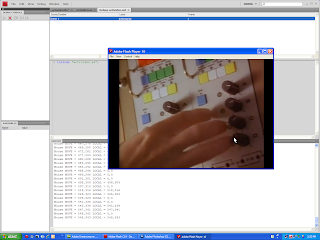
Inside Interactive Hotspot
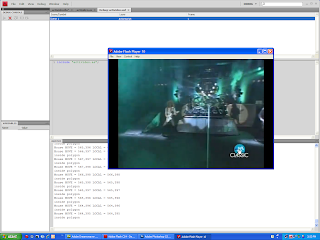
Step 20 Adobe Flash CS4 - Publish to the web
You will have to upload the F4V next to your SWF or change the local remote path with an http URL.
Publish and stream with FMS 3.0
You will have to change the local file path with an RTMP URL
Finally last but not least the beauty of XMP is that data can be injected on demand
straight into Flash Media Server, rather than having XMP permanently encoded into
the video this is why having the XMP as a separate file is also a valid use case.
On the other hand you can use a naming convention for each Key/Value Pair you want to add at the end of an XMP block in order to support multiple language or multiple condition. The only important thing is to make sure to append custom key/value pair string after the list of coordinates for each polygon belonging to an interactive sequence at a specific key frame. You can also keep the XMP files separate from the video if you want too by just exporting the XMP from the video after it has been added. You could use Flash remoting solution to deliver XMP as AMF objects from a web server using ColdFusion and PHP for instance :)
A new article to explain how to convert XMP Cuepoint time into Millisecond
http://younsi.blogspot.com/2009/02/how-to-convert-xmp-cuepoint-time-to.html
Adding Google Analytics
Google Analytics Hook into your SWF very usefull to report analytics when user click on an interactive hotspot in the video
import com.google.analytics.AnalyticsTracker;
import com.google.analytics.GATracker;
var tracker:AnalyticsTracker = new GATracker( this, "UA-111-222", "AS3", true );
playGame.addEventListener( MouseEvent.CLICK, onButtonClick );
function onButtonClick ( event:Event ):void
{
tracker.trackPageview("/myGame1");
}
In the following example, a movie clip called playGame exists on the stage. A new tracking object called tracker is created along with an event handler that listens for a mouse click. When the button is clicked, the onButtonClick function is called. For each click, the trackPageview() method increments the pageview count for the virtual page /myGame1.
http://www.google.com/analytics/
http://www.google.com/support/googleanalytics/bin/answer.py?hl=en&answer=55520
http://www.adobe.com/devnet/flash/articles/google_analytics_flash.html
http://code.google.com/p/gaforflash/
http://code.google.com/apis/analytics/docs/flashTrackingIntro.html
http://code.google.com/apis/analytics/docs/flashTrackingSetupFlash.html#useAnalyticsLibrary
Enjoy !
More reference about interactive video at Adobe and third party tools
XMPCore http://partners.adobe.com/public/developer/xmp/topic.html
XMP http://www.adobe.com/devnet/xmp/
Flash CS4 Video Playback http://www.adobe.com/devnet/flash/articles/flvplayback_fplayer9u3_04.html
Interactive Hotspot using After Effect
http://blogs.adobe.com/keyframes/2007/10/creating_interactive_video_wit.html
Activideo http://www.actimus.com/
How to receive XMP data using FLVPlayback Component
http://younsi.blogspot.com/2010/01/how-to-retrieve-xmp-cuepoint-for.html
FLV and F4V http://en.wikipedia.org/wiki/Flash_Video
XMP http://en.wikipedia.org/wiki/Extensible_Metadata_Platform
Xcitex Pro Analyst Motion Tracker http://www.xcitex.com/html/proanalyst_description.php
Free Action Script 3 Interactive "FLVPlayback" Component for Flash CS5
http://shop.actimus.com/product_info.php?products_id=122